Ubuntu 环境搭建
guide 网站推荐:
- google搜索:site:www.digitalocean.com mariaDB ubuntu
- google搜索:site:www.digitalocean.com nginx ubuntu
- google搜索:site:www.digitalocean.com php ubuntu
apt 相关操作
#1 更新和升级更新
  #1.1 更新包信息
  $ apt update
  #1.2 安装更新
  $ apt upgrade
#2 显示包列表
$ apt list
#3 安装包
  # 3.1 搜索
  $ apt search curl
  #3.2 安装
  $ apt install curl
  $ apt reinstall curl
#4 查看详情
$ apt show curl
$ apt info curl
#5  删除包
  #5.1 删除程序包httpd ,也就是卸载。
  $ apt remove httpd
进程查看|端口占用|端口监听
################# 查看进程 #################
#1 通过ps查看
$ ps -ef
$ ps -ef |grep nginx
$ ps aux
$ ps aux |grep nginx
	•	a:显示所有用户的进程。
	•	u:显示进程的详细信息。
	•	x:显示没有终端控制的进程。
#2 top 或 htop查看
$ apt install htop # htop没安装的 需要安装
$ top
$ htop
################# 查看进程 #################

################# 关闭进程 #################
$ kill PID 			#普通关闭
$ kill -9 PID 	#强制关闭
$ pkill 进程名		#按进程名关闭
$ killall 进程名	#按进程名关闭
################# 查看进程 #################

################# 查看端口占用 #################
#1 查看端口占用
$ sudo lsof -i :1086
$ lsof -i tcp:1086
#2 ps查看进程
$ ps -ef|grep nginx
$ ps -ef|grep php-fpm
$ history | grep ssh
#3 ps查看进程(PID/Name)
$ sudo pkill -9 541
$ sudo pkill -9 php-fpm
#4 ss 查看网络端口监听
$ ss -an | grep :22
#5 netstat 查看进程网络端口
$ netstat -lnp | grep redis
$ netstat -anpt |grep 443
  # Proto Recv-Q Send-Q Local Address           Foreign Address         State       PID/Program name
  # tcp        0      0 172.23.xxx.xx:6379      0.0.0.0:*               LISTEN      9239/redis-server 1

$ ss -tuln
	•	选项说明:
    •	-t:显示 TCP 端口。
    •	-u:显示 UDP 端口。
    •	-l:显示监听的端口。
    •	-n:以数字格式显示地址和端口(而不是解析为名称)。
$ apt install net-tools
$ netstat -tuln
################# 查看端口占用 #################
服务器本地化配置
################# bash本地化对中文支持 #################
#1 安装locales
$ apt show locales
$ apt install locales

#2 查看本地化语言有没有 zh_CN.utf-8
$ locale -a

#3 安装 zh_CN.UTF-8
$ locale-gen zh_CN.UTF-8
$ dpkg-reconfigure locales
	•	选232 zh_CN.UTF-8。
	•	选3 zh_CN.UTF-8。

#4 设置默认 Locale
$ vim /etc/default/locale
	# 输入:
LANG=zh_CN.UTF-8
LC_ALL=zh_CN.UTF-8

#4 验证设置结果
echo $LANG && echo $LC_ALL
################# bash本地化对中文支持 #################
用户|用户组管理
#1 查看用户和用户组 https://linuxhint.com/ubuntu-add-user-to-group/
	#1.1 查看所有用户组
	  getent group
	#1.2 查看当前用户和用户组
	  groups
	#1.3 查看www-data用户组的用户信息
  	groups www-data
	#1.4 查看www-data 用户详细信息
  	id www-data
#2 创建用户和用户组 https://linuxhint.com/ubuntu-add-user-to-group/
	#2.1 创建用户组
	  groupadd new_group
	#2.2 将已有用户加入用户组 usermod -a -G [group_name] [user_name]
	  usermod -a -G new_gourp www-data
	#2.3 新建用户并加入多个用户组 useradd -g group -G [group_name1],[group_name2] [new_user_name]
  	useradd -g group -G new_group,www-data new_user
	#2.4 将用户从用户组中移除 gpasswd -d [username] [groupname]
  	gpasswd -d new_user new_group
查找搜索 grep | cat | find | tail
grep 使用: ref1 ref2
#grep使用【搜索多个文件|搜索批量递归多个文件】:grep PATTERNS [OPTION]... [FILE]...
#1 在单个文件 或 多个文件 中查找
  grep "user" php.ini
  grep "user" php.ini -C 5
  grep "usr" php-fpm.conf php.ini
  grep "usr" php-fpm.conf php.ini -n
  grep -E "[1-9]+" file_1 file_2 file_3 ...
#2 递归搜索某目录文件
  grep -rn "user" ./
  grep -rn "user" /etc/php/
  grep "user" /etc/php/ -rn -R --include=*.ini -C 2
#3 匹配多个关键字
  grep -e "usr" -e "listen" -e "sock" -rn /etc/php/
  grep -E "usr|listen|sock" -rn /etc/php/
#4 在压缩文件中查找
  zgrep "open_api" sg-api.access.log.10.gz
  zgrep -e "directtopup_type" -e "directtopup_buy" sg-api.access.*.gz
#5 更多帮助
	grep --help
cat 使用:
#cat使用【搜索单个文件|搜索批量递归压缩文件|多文件合并】:cat [OPTION]... [FILE]...
#1 帮助
	cat --help
#2 查看单个文件 或 多个文件
  cat php.ini
  cat php.ini |grep "usr" -C 5
  cat php-fpm.conf php.ini -n |grep "usr"
  cat *Transfer*.log -n |grep "usr"
#3 多个文件合并输出
  cat php-fpm.conf php.ini > total.ini
  find data/ -name '*.json' -exec cat {} \; > total.json
#4 匹配多个关键字
  cat *.log -n |grep -e "usr" -e "listen" -e "sock"
  cat *.log -n |grep -e "usr" -e "listen" -e "sock" |wc -l
#5 在压缩文件中查找
  zcat api.access.log.*.gz |grep "open_api/directtopup_buy"
  zcat api.access.log.*.gz -r |grep "open_api/directtopup_buy" -n
  zcat api.access.log.*.gz -r |grep -e "directtopup_type" -e "directtopup_buy" -n
find 使用:
#find使用:find path expression
  -name filename       	#查找名为filename的文件
  -perm            			#按执行权限来查找
  -user  username      	#按文件属主来查找
  -group groupname      #按组来查找
  -mtime -n +n        	#按文件更改时间来查找文件,-n指n天以内,+n指n天以前
  -atime -n +n       		#按文件访问时间来查
  -ctime  -n +n       	#按文件创建时间来查找文件,-n指n天以内,+n指n天以前
  -nogroup          		#查无有效属组的文件,即文件的属组在/etc/groups中不存在
  -nouser           		#查无有效属主的文件,即文件的属主在/etc/passwd中不存
  -type  b/d/c/p/l/f    #查是块设备、目录、字符设备、管道、符号链接、普通文件
  -size   n[c]       		#查长度为n块[或n字节]的文件
  -depth           			#使查找在进入子目录前先行查找完本目录

#1 按文件名查找
  find / -name httpd.conf  		#在根目录下查找文件httpd.conf,表示在整个硬盘查找
  find /etc -name httpd.conf  #在/etc目录下文件httpd.conf
  find /etc -name '*srm*'  		#使用通配符*(0或者任意多个)。表示在/etc目录下查找文件名中含有字符串‘srm’的文件
  find . -name 'srm*'   			#表示当前目录下查找文件名开头是字符串‘srm’的文件
#2 按文件特征查找
  find / -amin -10   					#查找在系统中最后10分钟访问的文件(access time)
  find / -atime -2   					#查找在系统中最后48小时访问的文件
  find / -empty   						#查找在系统中为空的文件或者文件夹
  find / -group cat   				#查找在系统中属于 group为cat的文件
  find / -mmin -5   					#查找在系统中最后5分钟里修改过的文件(modify time)
  find / -mtime -1   					#查找在系统中最后24小时里修改过的文件
  find / -user fred   				#查找在系统中属于fred这个用户的文件
  find / -size +10000c  			#查找出大于10000000字节的文件(c:字节,w:双字,k:KB,M:MB,G:GB)
  find / -size -1000k   			#查找出小于1000KB的文件
#3 组合其他命令一起使用
  find ./ -mtime -1 -type f																							#查找1天之内修改过的文件
  find ./ -mtime -1 -type f -exec ls -lh {} \;													#查找1天之内修改过的文件
  find /etc/php/7.4/fpm/ -name "*.conf" |xargs grep "usr" -n						#对查找到的文件进行grep查找内容
  find ./ -maxdepth 1 -name "*.log" -mtime +60 -exec rm -rf {} \; 			#删除60天之外的所有.log文件
  find ./ -maxdepth 1 -name "*.xls" -mtime +7 -exec mv {} history \; 		#移动7天之外的xls文件
  find ./ -maxdepth 1 -name "*.log" -mtime +15 -exec mv {} ./history \;	#移动5天之外的log文件
ssh安装和配置
参考链接
命令详解
#1 版本查看 ssh客户端 sshd服务 sshd is the OpenSSH server process
  ssh -V
  sshd -V
#2 调试和日志
	#2.1 客户端调试
  	ssh -vvv username@hostname
	#2.2 服务端日志
  	cat /var/log/auth.log |grep ssh
  	grep sshd /var/log/auth.log
  	cat /var/log/syslog |grep ssh
  	grep -rsh ssh /var/log |sort
  	journalctl -u ssh.service --since today
	#2.3 服务状态
  	systemctl status ssh
  	systemctl status --full --lines=200 ssh
#3 查看和编辑配置文件
	#3.1 查看配置
		cat /etc/ssh/sshd_config
	#3.2 修改配置
		vi /etc/ssh/sshd_config
	#3.3 验证修改结果
		sshd -t
	#3.4 查看当前加载生效的配置参数
  	sshd -T
  	sshd -T |grep -i key
	#3.5 服务状态
  	systemctl status ssh
  	systemctl status --full --lines=200 ssh
#4 启动和停止服务
	systemctl start ssh
	systemctl restart ssh
	systemctl stop ssh
#5 ssh客户端超时中断的解决方案:编辑客户端 /etc/ssh/ssh_config (或~/.ssh/config 对当前用户生效) 文件
	# ~/.ssh/config文件头部添加下面两个配置
	ServerAliveInterval 60
	ServerAliveCountMax 3
#6 ssh-rsa支持(ssh8.7以后默认不支持ssh-rsa)
	# 本地客户端支持 ~/.ssh/config文件头部添加下面两个配置
	HostkeyAlgorithms +ssh-rsa
	PubkeyAcceptedAlgorithms +ssh-rsa
	# ssh服务端支持 vi /etc/ssh/sshd_config 文件尾部增加
	PubkeyAcceptedKeyTypes +ssh-rsa
systemctl安装和使用
################# 安装systemctl #################
$ apt show systemd
$ apt install systemd
$ which systemd
$ which systemctl
################# 安装systemctl #################

################# 使用systemctl #################
#1 启动服务
$ systemctl start nginx
#2 停止服务
$ systemctl stop nginx
#3 重启服务(关闭 并 重启)
$ systemctl restart nginx
#4 重载服务
$ systemctl reload nginx
#5 开机自动启动服务
$ systemctl enable nginx
#6 关闭开机自动启动服务
$ systemctl disable nginx
#7 查看服务的状态
$ systemctl status nginx
#8 查看正在运行的服务列表
$ systemctl list-units --type=service
#9 查看没有运行的unit列表
$ systemctl list-units --all --state=inactive
	## Service unit,系统服务
	## Target unit,多个 Unit 构成的一个组
	## Device Unit,硬件设备
	## Mount Unit,文件系统的挂载点
	## Automount Unit,自动挂载点
	## Path Unit,文件或路径
	## Scope Unit,不是由 Systemd 启动的外部进程
	## Slice Unit,进程组
	## Snapshot Unit,Systemd 快照,可以切回某个快照
	## Socket Unit,进程间通信的 socket
	## Swap Unit,swap 文件
	## Timer Unit,定时器
#10 查看unit的配置文件
$ systemctl cat nginx
################# 使用systemctl #################
nginx 安装和管理
#1 安装和卸载
	#1.1 更新所有安装包库信息
		apt update
	#1.2 查看nginx 安装包信息
		apt info nginx
	#1.3 安装nginx
		apt install nginx
	#1.4 卸载nginx
		apt remove nginx
	#1.5 重装nginx
	apt reinstall nginx
#2 配置和验证配置
	nginx -t
	# 待完善
#3 启动|重启|管理
	#3.1 启动nginx
		systemctl start nginx
	#3.2 关闭并重启nginx
		systemctl restart nginx
	#3.3 平滑重启nginx
		systemctl reload nginx
	#3.4 停止nginx
		systemctl stop nginx
	#3.5 查看nginx状态
		systemctl status nginx
		ps aumx|grep nginx
		sudo kill 30443
		sudo killall nginx
redis 安装|管理|命令行管理数据
参考链接
命令详解
#1 安装和卸载
	apt update
	apt search redis
	apt info redis
	apt show redis
	apt install redis
	apt remove redis
#2 配置
	cat /etc/redis/redis.conf
	vi /etc/redis/redis.conf
	# 修改db 数量
	databases 256
	# 保存并重启
	# 增加外网ip
	bind 172.23.xxx.xxx 39.98.xxx.xxx
#3 启动|重启|关闭
	systemctl start redis
	systemctl restart redis
	systemctl stop redis
	systemctl status redis
	systemctl status --full --lines=200 redis
#4 查看redis的 版本|正在使用的端口
	redis-server --version
	netstat -lnp | grep redis
#5 调试验证
	redis-cli
	ping
	set mykey "Hello Word"
	get mykey
	exit
	redis-cli INCR mycounter
	redis-cli -h redis15.localnet.org -p 6390 PING
	redis-cli ping
	redis-cli --stat
php安装和管理:
php安装
#1 更新apt包资源信息 并 添加额外的软件下载源
  apt update
  apt -y install software-properties-common
#2 添加php版本库‘ppa:ondrej/php’ 并 再次更新apt包资源信息
  add-apt-repository ppa:ondrej/php
  apt update
#3 安装php
  apt search php7.4
  apt info php7.4
  apt install php7.4
#4 安装常用的php扩展
  apt install -y apt php7.4-fpm php7.4-cli php7.4-bcmath php7.4-gd php7.4-json php7.4-mbstring php7.4-mcrypt php7.4-mysqlnd php7.4-opcache php7.4-geoip php7.4-snmp php7.4-soap php7.4-common php7.4-zip php7.4-curl php7.4-xml php7.4-redis php7.4-memcached
# 查看版本
  php -v
  php7.4 -v
# 查找安装插件信息
  php7.4 -i |grep mysql
  php -i |grep mysql
  php -i |grep memcached
  php -i |grep redis
# 显示已经加载的插件
	php -m
php配置和启停
-
配置 php.ini
#查找php.ini位置:
	find /etc/ -name "php.ini"
	# /etc/php/7.4/fpm/php.ini
#The current PHP memory limit is below the recommended value of 512MB.
	vi /etc/php/7.4/fpm/php.ini
	memory_limit = 128
php-fpm配置和启停
-
配置 www.conf
#查看nginx进程所属用户
  ps -ef |grep nginx
  # www-data    2410    2408  0 Nov12 ?        00:00:00 nginx: worker process
  id www-data
  # uid=33(www-data) gid=33(www-data) groups=33(www-data)
#查找www.conf位置:
	find /etc/ -name "www.conf"
	# /etc/php/7.4/fpm/pool.d/www.conf
#设置fpm 进程池用户和nginx一致
#user and group: The user and group under which the pool will run.
  vi /etc/php/7.4/fpm/pool.d/www.conf
  user = www-data
  group = www-data
# 配置listen (留意nginx fastcgi_pass)
# listen: The name of the socket file for this pool.
  listen = /run/php/php7.4-fpm.sock
# 配置listen owner&group: Must match to the user and group on which NGINX is running.
  listen.owner = www-data
  listen.group = www-data
  listen.mode = 0660
# 进程模式:static=静态模式 用于高负荷,会创建max_children的线程池; dynamic=动态模式 根据请求多少创建线程数量
  pm = dynamic
  pm.max_children = 100
pm.max_requests = 500 -
重启和验证
#重启php-fpm
  systemctl restart php7.4-fpm.service		#重启
  systemctl status php7.4-fpm.service			#查看运行状态
  journalctl -xeu php7.4-fpm.service			#查看服务运行日志
  ps -ef |grep php												#查看进程信息
#查看sock文件权限 nginx是否可读写
	ls -lh /run/php/php7.4-fpm.sock
	# srw-rw---- 1 www-data www-data 0 Nov 13 22:46 /run/php/php7.4-fpm.sock
# nginx 也是www-data用户,所以可读写 -
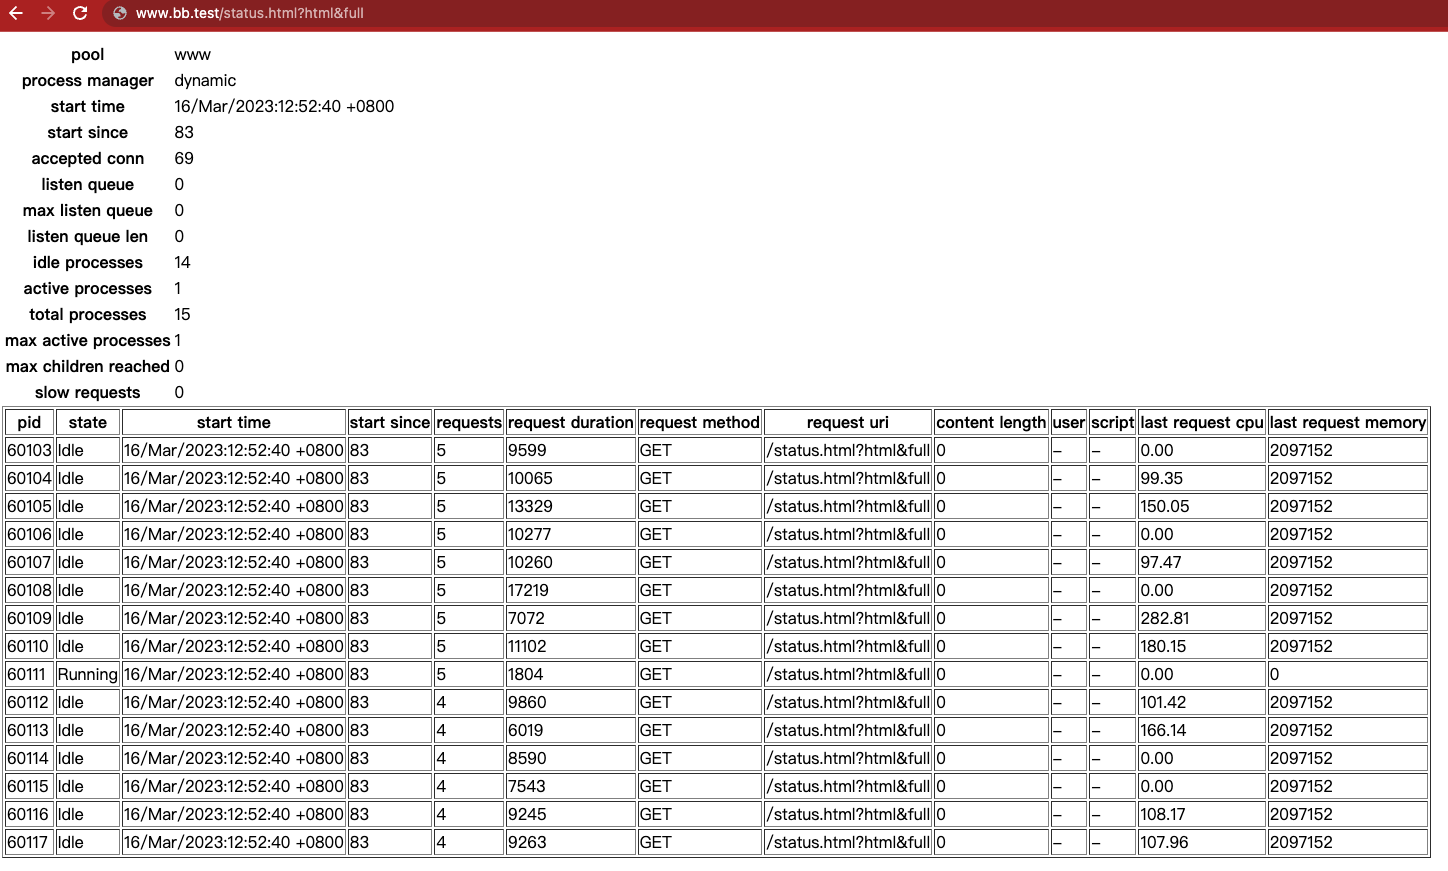
配置php-fpm status 查看
-
配置php-fpm status:www.conf中打开这行配置
; 开启pm.status_path配置,默认pm.status_path = /status 但“/status”容易和nginx中其他配置冲突,所以改为特定的后缀
pm.status_path = /php-fpm-status.html -
配置nginx
location /php-fpm-status.html {
    access_log off;
    allow 127.0.0.1;
    allow 192.168.0.108;
    deny all;
    fastcgi_param SCRIPT_FILENAME $document_root$fastcgi_script_name;
    include fastcgi_params;
    fastcgi_pass 127.0.0.1:9000;
} -
重启php-fpm 和 nginx
-
浏览器查看效果:http://www.bb.test/php-fpm-status.html?html&full
-
php74 issues
-
openssl_encrypt return false
//加密时 返回false
var_dump(openssl_encrypt("BBToo-cpanel|10100|1668609963|2101677875", "des-cfb", "I3s9*59jZroPx0q9*81jkk2Hx09*36UkM2zY0jX@.a2E2", 0, "i38rOmuL"));
//boo(false)

// 查看错误信息
echo openssl_error_string();
//error:03000082:digital envelope routines::invalid key length

//原因是 openssl版本为 3,php74 不支持,需要修改 openssl 配置 使openssl向下兼容
	//1 查看php openssl配置
    root@bbtoo:/etc/ssl# php -i |grep openssl
    libSSH Version => libssh/0.9.6/openssl/zlib
    openssl
    Openssl default config => /usr/lib/ssl/openssl.cnf
    openssl.cafile => no value => no value
    openssl.capath => no value => no value
	//2 编辑 查看php openssl配置
  	vi 	/usr/lib/ssl/openssl.cnf
    // 修改相关内容 并保存
    [provider_sect]
    default = default_sect
    legacy = legacy_sect

    [default_sect]
    activate = 1

    [legacy_sect]
    activate = 1

//再次测试加密 成功
var_dump(openssl_encrypt("BBToo-cpanel|10100|1668609963|2101677875", "des-cfb", "I3s9*59jZroPx0q9*81jkk2Hx09*36UkM2zY0jX@.a2E2", 0, "i38rOmuL"));
string(56) "d+W7daYIYk6+2qZAh40uaRv2hFIirNNiLvRN3/aMM2pG0W+OYVa+OQ=="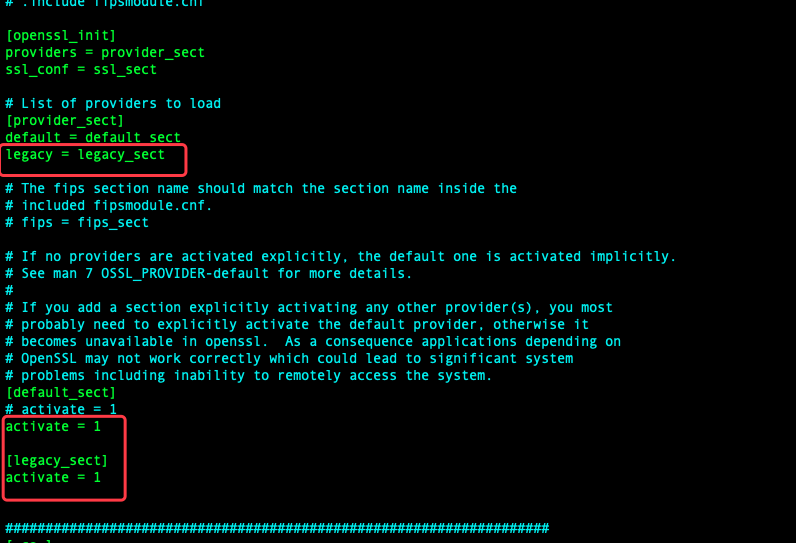
composer 安装和管理
-
检查相关依赖是否安装|没有需要安装
#需要的依赖有:apt install php7.4-cli php7.4-zip wget unzip
  apt info wget
  apt info php7.4-cli
  apt info php7.4-zip
  apt info unzip
  apt search php7.4 |grep zip			#发现没有安装php-zip
apt install php7.4-zip #安装php-zip -
安装
#1 下载composer installer script
	php -r "copy('https://getcomposer.org/installer', 'composer-setup.php');"
#2 验证下载文件面md5 —— 可以省略
  HASH="$(wget -q -O - https://composer.github.io/installer.sig)"
  php -r "if (hash_file('SHA384', 'composer-setup.php') === '$HASH') { echo 'Installer verified'; } else { echo 'Installer corrupt'; unlink('composer-setup.php'); } echo PHP_EOL;"
#3 安装
php composer-setup.php --install-dir=/usr/local/bin --filename=composer -
安装结果验证
su www-data -c "composer -v"
#错误:This account is currently not available.
  #处理办法1 修改 /etc/passwd 中www-data用户的shell
    www-data:x:33:33:www-data:/var/www:/usr/sbin/nologin
    #改为:
    www-data:x:33:33:www-data:/var/www:/bin/bash
  #处理办法2 运行时 指定shell
  	su www-data -s /bin/bash -c "composer -v"
#错误“/usr/bin/env: “php”: 没有那个文件或目录” 需要执行第五步
	#将php7.4 link到系统的php
	ln -s /usr/bin/php7.4 /usr/bin/php
MariaDB
MariaDB安装和基础配置
#1 查看并安装mariadb
	apt update
	apt info mariadb-server
	apt install mariadb-server
#2 启动mariadb
	systemctl start mariadb.service
#3 检查数据库
  #3.1 数据库数据 所在目录
    cd /var/lib/mysql/mysql
    ls #查看数据表文件是否创建好
	#3.2 命令行连接数据库
    /usr/bin/mysql -u root mysql
    show tables; 	#查看数据表
    exit; 				#退出
#4 数据库安全设置
  # 数据库用户安全配置命令
  	mysql_secure_installation
  # 注意:如果是配置root账户 需要sudo
  	sudo mysql_secure_installation
  #1 数据库用户密码 初始密码为空,直接按回车
  	Enter current password for root (enter for none):
  	OK, successfully used password, moving on
  #2 是否允许系统用户直接登录 新增功能,输入“n”
  	Enable unix_socket authentication? [Y/n] n
   	... skipping.
  #3 修改root用户密码 y
  	Change the root password? [Y/n] y
  	New password:									# 输入新密码
  	Re-enter new password:				# 再次输入新密码
  	Password updated successfully!
  #4 删除anonymous用户 y
  	Remove anonymous users? [Y/n] y
   	... Success!
  #5 是否禁止远程登录 y 注意 如果是需要通过root远程登录选择 n
  	Disallow root login remotely? [Y/n] y
   	... Success!
  #6 删除测试数据库 y
    Remove test database and access to it? [Y/n] y
     - Dropping test database...
     ... Success!
     - Removing privileges on test database...
     ... Success!
  #7 重新加载权限表 y
    Reload privilege tables now? [Y/n] y
     ... Success!
#5 测试登录
	mysql -uroot -p
MariaDB配置文件
#1 配置文件地址 /etc/mysql
	# conf.d  debian.cnf  debian-start  mariadb.cnf  mariadb.conf.d  my.cnf  my.cnf.fallback
#2 配置文件加载顺序(查看"cat /etc/mysql/mariadb.cnf"):
  # The MariaDB/MySQL tools read configuration files in the following order:
  # 0. "/etc/mysql/my.cnf" symlinks to this file, reason why all the rest is read.
  # 1. "/etc/mysql/mariadb.cnf" (this file) to set global defaults,
  # 2. "/etc/mysql/conf.d/*.cnf" to set global options.
  # 3. "/etc/mysql/mariadb.conf.d/*.cnf" to set MariaDB-only options.
  # 4. "~/.my.cnf" to set user-specific options
端口监听支持外网:MariaDB配置外网访问
#1 检查外网3306端口是否开启
	# 默认只监听本机端口 外网无法访问:"127.0.0.1:3306"
	#1.1 本地用nc检查服务器端口:refused 失败
	zhoujh@MBP21 docs % nc -vz 39.98.xxx.xxx 3306
	nc: connectx to 39.98.xxx.xxx port 3306 (tcp) failed: Connection refused
	#1.2 服务器用netstat检查端口情况:只监听了本地的"127.0.0.1:3306"
	root@bbtoo:/etc/mysql# netstat  -anpt | grep   3306
	tcp        0      0 127.0.0.1:3306          0.0.0.0:*               LISTEN      1123/mariadbd
#2 修改配置 开启外网访问
	#2.1 搜索查看配置
		grep -rn "bind-address" /etc/mysql/
		#/etc/mysql/mariadb.conf.d/50-server.cnf:27:bind-address            = 127.0.0.1
		#/etc/mysql/mariadb.conf.d/60-galera.cnf:17:#bind-address = 0.0.0.0
	#2.2 修改配置
		vi /etc/mysql/mariadb.conf.d/50-server.cnf
		bind-address            = 0.0.0.0
	#2.3 重启服务
		systemctl restart mariadb.server
#3 再次检查外网3306端口是否开启
	#3.1 本地用nc检查服务器端口:refused 失败
	zhoujh@MBP21 docs % nc -vz 39.98.xxx.xxx 3306
	Connection to 39.98.xxx.xxx port 3306 [tcp/mysql] succeeded!
	#3.2 服务器用netstat检查端口情况:只监听了本地的"127.0.0.1:3306"
	root@bbtoo:/etc/mysql# netstat  -anpt | grep   3306
	tcp        0      0 0.0.0.0:3306            0.0.0.0:*               LISTEN      10158/mariadbd
MariaDB用户配置和远程连接
#1 在sequel pro 用root账户 + SSH 连接 数据库
#2 通过add database 添加数据库
#3 在sequel ace 用root账户+ssh连接数据库
#4 cmd+u 创建新用户
#5 为新用户添加ip外网地址白名单
#6 通过本地命令行远程连接测试新用户
mysql -h39.98.xxx.xxx -ubbtoo_core -pwED37nDhzU2JflDx
docker 安装和配置
docker 安装
#1 安装yum-utils
  sudo yum install -y yum-utils
#2 添加docker版本库
  sudo yum-config-manager \
    --add-repo \
    https://download.docker.com/linux/centos/docker-ce.repo
#3 安装docker
  sudo yum install docker-ce docker-ce-cli containerd.io
    # Total download size: 89 M
		# Installed size: 369 M
		Is this ok [y/d/N]: y
		# Importing GPG key 0x621E9F35:
 		# Userid     : "Docker Release (CE rpm) <docker@docker.com>"
 		# Fingerprint: 060a 61c5 1b55 8a7f 742b 77aa c52f eb6b 621e 9f35
 		# From       : https://download.docker.com/linux/centos/gpg
		Is this ok [y/N]: y
#4 启动docker
	sudo systemctl start docker
#5 测试docker
	sudo docker run hello-world
#6 删除docker
	sudo yum remove docker-ce docker-ce-cli containerd.io
	sudo rm -rf /var/lib/docker
docker常用命令
#1 查看镜像
  docker images
#2 查看容器
  docker ps
#3 查看所有容器
	docker ps -a
#4 启动容器
  docker start 8978e4a8f620
#5 进入容器
  docker attach 8978e4a8f620
#6 删除容器:
  docker rm container_id
  docker rm container_name
#7 删除所有容器:
  docker rm $(docker ps -a -q)
#8 删除镜像:
	docker rmi image_id
	docker rmi image_name
#9 删除所有镜像:
	docker rmi $(docker ps -a -q)
docker exec
#1 进入容器环境: docker exec [OPTIONS] CONTAINER COMMAND [ARG...]
docker exec -it ubuntu_bash bash
docker exec -it 52d630cd71c404214e9390872a83f5e225ffed36ce24f2e34320ce4483476f8f /bin/sh; exit
安装docker-compose
#1 通过镜像安装
	sudo curl -L "https://github.com/docker/compose/releases/download/1.25.5/docker-compose-$(uname -s)-$(uname -m)" -o /usr/local/bin/docker-compose
#2 改为可执行程序
	sudo chmod +x /usr/local/bin/docker-compose
#3 检查安装是否成功
	docker-compose --version
安装docker image和启动
#1 安装image
	docker-compose build
#2 安装容器并启动docker
	docker-compose up
#3 启动docker
	docker-compose start
#4 停止docker
	docker-compose stop
代理设置(暂时的)
#1 开启代理
  export http_proxy=127.0.0.1:1087
  export https_proxy=127.0.0.1:1087
#2 关闭代理
  unset http_proxy
  unset https_proxy
git代理设置(长期的)
#1 查看全局配置
git config --global --list
#2 设置
git config --global http.proxy http://127.0.0.1:1087
git config --global https.proxy https://127.0.0.1:1087
#3 取消设置
git config --global --unset http.proxy
git config --global --unset https.proxy
文件管理
缓存文件夹清理(s-store/tmp为例)
    #1 将tmp中超过15天的文件 移动到 s-store-copys/tmp文件夹中命令:
    cd /xxx/xxx/s-store/tmp
    sudo find ./ -name "*.png" -mtime +15 -exec mv {} ../../s-store-copys/tmp \;
    sudo find ./ -name "*.jpg" -mtime +15 -exec mv {} ../../s-store-copys/tmp \;
    sudo find ./ -name "*.jpeg" -mtime +15 -exec mv {} ../../s-store-copys/tmp \;
    sudo find ./ -name "*.PNG" -mtime +15 -exec mv {} ../../s-store-copys/tmp \;
    sudo find ./ -name "*blob" -mtime +15 -exec mv {} ../../s-store-copys/tmp \;
    sudo find ./ -name "*.JPG" -mtime +15 -exec mv {} ../../s-store-copys/tmp \;
打包压缩
-
压缩单个文件:
tar -zcvf log.tar.gz 20_02_17Log.log -
压缩批量文件:
#1. 将3天以外的log 移动到history
sudo find ./ -maxdepth 1 -name "*.log" -mtime +3 -exec mv {} history \;
#2. 去到history
cd history/
#3. 压缩打包
tar -zcvf 20200117_20200215log.tar.gz *.log
#4. 删除history中的log
rm -rf *.log
#5. 查看剩余空间
df -h
批量移动/删除文件:
#1 删除60天之外的所有.log文件:
  sudo find ./ -maxdepth 1 -name "*.log" -mtime +60 -exec rm -rf {} \;
#2 find 命令
  # 当前目录下 .log 结尾的文件:  ./ -name "*.log"
  # 60天之外的: -mtime +60
  # 对查找结果 执行的操作: -exec rm -rf {} \
#3 移动15天之外的日志:
  sudo find ./ -maxdepth 1 -name "*.xls" -mtime +7 -exec mv {} history \;
  sudo find ./ -maxdepth 1 -name "*.log" -mtime +15 -exec mv {} ./histories \;
find 命令介绍:mac 显示隐藏文件+Find命令
移动、复制、删除
mv ks-store ks-store.bak
mv ks-store.20180727 ks-store
rm -rf node_modules
cp ks-api ks-api.20180730 -r
cp -r sg-api copy-sg-api/sg-api-0701
空间查看
#1 centos 查看文件可用空间:
df -h
#2 查看当前目录文件夹大小:
du -h --max-depth 1
#3 查看当前文件列表大小:
ls -lh
权限更改
- centos 查看文件可用空间:
df -h - 查看当前目录文件夹大小:
du -h --max-depth 1 - 修改文件的用户属性:
chown www-data: *.xml
文件上传下载
#1 远程下载文件:
scp -P22 ct@52.74.xxx.xxx:/xxx/xxx/sg-pay/logs/ks_call.log ~/Downloads/ks-call.log
scp -P22 ct@sg-cpanel:/xxx/xxx/xxx/sg-cpanel.access.log-20190318.gz ~/Downloads/cpanel.log-0318.gz
#2 远程下载文件夹
scp -r -P22 ct@52.74.xxx.xxx:/xxx/xxx/s-store/web/skin/js/data ~/Downloads/data
scp -P22 ct@sg-cpanel:/xxx/xxx/sg/xxx/32DFE214-0971-3497-6D1B-EB745D72E18A.xlsx ~/Downloads/cas.xlsx
#3 远程上传文件
npm
npm常用命令
#1 查看安装列表 ls 、list
npm ls -g
npm list -g --depth 0
npm ls
#2 搜索:https://docs.npmjs.com/cli-commands/view.html
npm search gulp
npm view gulp
npm version
#3 安装
npm install gulp
npm install gulp -g
#4 更新
npm update gulp
#5 删除
npm uninstall gulp
npm uninstall gulp -g
#6 清除缓存
npm cache clean
npm package管理
#1 初始化 生成package.json
npm init
#2 安装并添加到 package
npm install gulp --save
#3 直接通过package.json安装
npm install
npm 代理设置(长期的)
#1 开启代理
npm config set proxy http://127.0.0.1:1087
npm config set proxy http://127.0.0.1:1087
#2 查看:
npm config list
#3 关闭代理
npm config delete proxy
npm config delete https_proxy
OSS命令行上传(通过“ossutil64”工具)
安装ossutil64
############################ 新的安装方式 ############################
#1 下载安装
sudo -v ; curl https://gosspublic.alicdn.com/ossutil/install.sh | sudo bash

#2 配置endpoints 和 accesskey
ossutil config		# 依次输入:相关的配置内容

#3 配置好后 查看配置内容
cat /root/.ossutilconfig
	# [Credentials]
	# language=CH
	# endpoint=oss-ap-southeast-1-internal.aliyuncs.com
	# accessKeyID=LTA************ssbPZ
	# accessKeySecret=00n*************okDxp

############################ 老的安装方式 ############################
#1 下载安装
#1.1 定位到安装目录
cd /usr/local/bin/
#1.2 下载
wget https://gosspublic.alicdn.com/ossutil/1.7.13/ossutil64
#1.3 将下载的文件改为可执行文件
chmod 755 ossutil64

#2 配置endpoints 和 accesskey
ossutil64 config
# 依次输入:相关的配置内容
# 配置好后 查看配置内容
cat /root/.ossutilconfig
	# [Credentials]
	# language=CH
	# endpoint=oss-ap-southeast-1-internal.aliyuncs.com
	# accessKeyID=LTA************ssbPZ
	# accessKeySecret=00n*************okDxp
使用ossutil64
#1 查看oss 桶
ossutil64 ls
#2 查看桶中的文件
ossutil64 ls oss://sg-copys
#3 上传单个文件
ossutil64 cp /var/log/payment/xxxx.log oss://sg-copys/ecs-logs/xxxx.log
#4 上传批量文件
ossutil64 cp -r /var/log/payment/ oss://sg-copys/ecs-logs/
git:
git reset -hard 21e4615ac29c880171ccb7454b91b08c07e56e65
Issues
Error loading Python lib '/tmp/_MEI5AbIEA/libpython3.9.so.1.0': dlopen: /lib64/libc.so.6: version `GLIBC_2.28' not found (required by /tmp/_MEI5AbIEA/libpython3.9.so.1.0)
#1 检查centos 版本
cat /etc/redhat-release
#2 检查glibc版本
strings /lib64/libc.so.6 | grep GLIBC_
#3 方案1 备份系统 在ali云后台 升级主机操作系统到centos8.2
#3 方案2 升级glibc
connect() to unix:/var/opt/remi/php73/run/php-fpm/www.sock failed (13: Permission denied) while connecting to upstream,
#1 检查php配置 listen 和 user
	vi /etc/opt/remi/php73/php-fpm.d/www.conf
  user = apache
  group = apache
  # 配置user & user group
  user = nginx
  group = nginx
  # 配置listen
  listen.owner = nginx
  listen.group = nginx
  listen.mode = 0660
  # **留意配置 需要注释掉这行** 不然会出现启动php fpm后www.sock文件属性变成了root用户组
  ;listen.acl_users = apache,nginx
  # 留意nginx fastcgi_pass
  listen = /var/opt/remi/php73/run/php-fpm/www.sock
#2 检查文件权限 /var/opt/remi/php73/run/php-fpm/www.sock
83942285 srw-rw----+ 1 root root 0 1月  23 20:45 www.sock
#3 发现读写权限给了root 所以提示没有权限 需要把权限给nginx用户
chown nginx: www.sock
#4 重启php-fpm后发现文件用户组 自动发生了改变 变成了root 用户组 的解决办法
	# 编辑保存nginx 用户组权限
	vi /etc/passwd
		# 将 nginx:x:989:983:Nginx web server:/var/lib/nginx:/sbin/nologin 改为33:
		nginx:x:33:33:Nginx web server:/var/lib/nginx:/sbin/nologin
	# 编辑保存nginx 用户组权限
	vi /etc/group
		#将 nginx:x:983: 改为33
		nginx:x:33:
# 5 在ali云后台 重启服务器
参考:用户和用户组管理
How To Install Nginx on Ubuntu 20.04
Published on April 25, 2020 · Updated on January 6, 2022
Introduction
Nginx is one of the most popular web servers in the world and is responsible for hosting some of the largest and highest-traffic sites on the internet. It is a lightweight choice that can be used as either a web server or reverse proxy.
In this guide, we’ll discuss how to install Nginx on your Ubuntu 20.04 server, adjust the firewall, manage the Nginx process, and set up server blocks for hosting more than one domain from a single server.
Prerequisites
Before you begin this guide, you should have a regular, non-root user with sudo privileges configured on your server. You can learn how to configure a regular user account by following our Initial server setup guide for Ubuntu 20.04.
You will also optionally want to have registered a domain name before completing the last steps of this tutorial. To learn more about setting up a domain name with DigitalOcean, please refer to our Introduction to DigitalOcean DNS.
When you have an account available, log in as your non-root user to begin.
Step 1 – Installing Nginx
Because Nginx is available in Ubuntu’s default repositories, it is possible to install it from these repositories using the apt packaging system.
Since this is our first interaction with the apt packaging system in this session, we will update our local package index so that we have access to the most recent package listings. Afterwards, we can install nginx:
sudo apt update
sudo apt install nginx
After accepting the procedure, apt will install Nginx and any required dependencies to your server.
Step 2 – Adjusting the Firewall
Before testing Nginx, the firewall software needs to be adjusted to allow access to the service. Nginx registers itself as a service with ufw upon installation, making it straightforward to allow Nginx access.
List the application configurations that ufw knows how to work with by typing:
sudo ufw app list
You should get a listing of the application profiles:
Output
Available applications:
  Nginx Full
  Nginx HTTP
  Nginx HTTPS
  OpenSSH
As demonstrated by the output, there are three profiles available for Nginx:
- Nginx Full: This profile opens both port 80 (normal, unencrypted web traffic) and port 443 (TLS/SSL encrypted traffic)
- Nginx HTTP: This profile opens only port 80 (normal, unencrypted web traffic)
- Nginx HTTPS: This profile opens only port 443 (TLS/SSL encrypted traffic)
It is recommended that you enable the most restrictive profile that will still allow the traffic you’ve configured. Right now, we will only need to allow traffic on port 80.
You can enable this by typing:
sudo ufw allow 'Nginx HTTP'
You can verify the change by typing:
sudo ufw status
The output will indicated which HTTP traffic is allowed:
Output
Status: active

To                         Action      From
--                         ------      ----
OpenSSH                    ALLOW       Anywhere
Nginx HTTP                 ALLOW       Anywhere
OpenSSH (v6)               ALLOW       Anywhere (v6)
Nginx HTTP (v6)            ALLOW       Anywhere (v6)
Step 3 – Checking your Web Server
At the end of the installation process, Ubuntu 20.04 starts Nginx. The web server should already be up and running.
We can check with the systemd init system to make sure the service is running by typing:
systemctl status nginx
Output
● nginx.service - A high performance web server and a reverse proxy server
   Loaded: loaded (/lib/systemd/system/nginx.service; enabled; vendor preset: enabled)
   Active: active (running) since Fri 2020-04-20 16:08:19 UTC; 3 days ago
     Docs: man:nginx(8)
 Main PID: 2369 (nginx)
    Tasks: 2 (limit: 1153)
   Memory: 3.5M
   CGroup: /system.slice/nginx.service
           ├─2369 nginx: master process /usr/sbin/nginx -g daemon on; master_process on;
           └─2380 nginx: worker process
As confirmed by this out, the service has started successfully. However, the best way to test this is to actually request a page from Nginx.
You can access the default Nginx landing page to confirm that the software is running properly by navigating to your server’s IP address. If you do not know your server’s IP address, you can find it by using the icanhazip.com tool, which will give you your public IP address as received from another location on the internet:
curl -4 icanhazip.com
When you have your server’s IP address, enter it into your browser’s address bar:
http://your_server_ip
You should receive the default Nginx landing page:
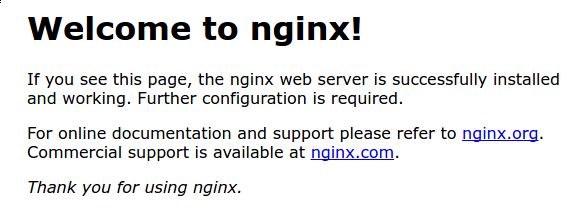
If you are on this page, your server is running correctly and is ready to be managed.
Step 4 – Managing the Nginx Process
Now that you have your web server up and running, let’s review some basic management commands.
To stop your web server, type:
sudo systemctl stop nginx
To start the web server when it is stopped, type:
sudo systemctl start nginx
To stop and then start the service again, type:
sudo systemctl restart nginx
If you are only making configuration changes, Nginx can often reload without dropping connections. To do this, type:
sudo systemctl reload nginx
By default, Nginx is configured to start automatically when the server boots. If this is not what you want, you can disable this behavior by typing:
sudo systemctl disable nginx
To re-enable the service to start up at boot, you can type:
sudo systemctl enable nginx
You have now learned basic management commands and should be ready to configure the site to host more than one domain.
Step 5 – Setting Up Server Blocks (Recommended)
When using the Nginx web server, server blocks (similar to virtual hosts in Apache) can be used to encapsulate configuration details and host more than one domain from a single server. We will set up a domain called your_domain, but you should replace this with your own domain name.
Nginx on Ubuntu 20.04 has one server block enabled by default that is configured to serve documents out of a directory at /var/www/html. While this works well for a single site, it can become unwieldy if you are hosting multiple sites. Instead of modifying /var/www/html, let’s create a directory structure within /var/www for our your_domain site, leaving /var/www/html in place as the default directory to be served if a client request doesn’t match any other sites.
Create the directory for your_domain as follows, using the -p flag to create any necessary parent directories:
sudo mkdir -p /var/www/your_domain/html
Next, assign ownership of the directory with the $USER environment variable:
sudo chown -R $USER:$USER /var/www/your_domain/html
The permissions of your web roots should be correct if you haven’t modified your umask value, which sets default file permissions. To ensure that your permissions are correct and allow the owner to read, write, and execute the files while granting only read and execute permissions to groups and others, you can input the following command:
sudo chmod -R 755 /var/www/your_domain
Next, create a sample index.html page using nano or your favorite editor:
sudo nano /var/www/your_domain/html/index.html
Inside, add the following sample HTML:
/var/www/your_domain/html/index.html
<html>
    <head>
        <title>Welcome to your_domain!</title>
    </head>
    <body>
        <h1>Success!  The your_domain server block is working!</h1>
    </body>
</html>
Save and close the file by pressing Ctrl+X to exit, then when prompted to save, Y and then Enter.
In order for Nginx to serve this content, it’s necessary to create a server block with the correct directives. Instead of modifying the default configuration file directly, let’s make a new one at /etc/nginx/sites-available/your_domain:
sudo nano /etc/nginx/sites-available/your_domain
Paste in the following configuration block, which is similar to the default, but updated for our new directory and domain name:
/etc/nginx/sites-available/your_domain
server {
        listen 80;
        listen [::]:80;

        root /var/www/your_domain/html;
        index index.html index.htm index.nginx-debian.html;

        server_name your_domain www.your_domain;

        location / {
                try_files $uri $uri/ =404;
        }
}
Notice that we’ve updated the root configuration to our new directory, and the server_name to our domain name.
Next, let’s enable the file by creating a link from it to the sites-enabled directory, which Nginx reads from during startup:
sudo ln -s /etc/nginx/sites-available/your_domain /etc/nginx/sites-enabled/
Note: Nginx uses a common practice called symbolic links, or symlinks, to track which of your server blocks are enabled. Creating a symlink is like creating a shortcut on disk, so that you could later delete the shortcut from the sites-enabled directory while keeping the server block in sites-available if you wanted to enable it.
Two server blocks are now enabled and configured to respond to requests based on their listen and server_name directives (you can read more about how Nginx processes these directives here):
your_domain: Will respond to requests foryour_domainandwww.your_domain.default: Will respond to any requests on port 80 that do not match the other two blocks.
To avoid a possible hash bucket memory problem that can arise from adding additional server names, it is necessary to adjust a single value in the /etc/nginx/nginx.conf file. Open the file:
sudo nano /etc/nginx/nginx.conf
Find the server_names_hash_bucket_size directive and remove the # symbol to uncomment the line. If you are using nano, you can quickly search for words in the file by pressing CTRL and w.
Note: Commenting out lines of code – usually by putting # at the start of a line – is another way of disabling them without needing to actually delete them. Many configuration files ship with multiple options commented out so that they can be enabled or disabled, by toggling them between active code and documentation.
/etc/nginx/nginx.conf
...
http {
    ...
    server_names_hash_bucket_size 64;
    ...
}
...
Save and close the file when you are finished.
Next, test to make sure that there are no syntax errors in any of your Nginx files:
sudo nginx -t
If there aren’t any problems, restart Nginx to enable your changes:
sudo systemctl restart nginx
Nginx should now be serving your domain name. You can test this by navigating to http://your_domain, where you should see something like this:

Step 6 – Getting Familiar with Important Nginx Files and Directories
Now that you know how to manage the Nginx service itself, you should take a few minutes to familiarize yourself with a few important directories and files.
Content
/var/www/html: The actual web content, which by default only consists of the default Nginx page you saw earlier, is served out of the/var/www/htmldirectory. This can be changed by altering Nginx configuration files.
Server Configuration
/etc/nginx: The Nginx configuration directory. All of the Nginx configuration files reside here./etc/nginx/nginx.conf: The main Nginx configuration file. This can be modified to make changes to the Nginx global configuration./etc/nginx/sites-available/: The directory where per-site server blocks can be stored. Nginx will not use the configuration files found in this directory unless they are linked to thesites-enableddirectory. Typically, all server block configuration is done in this directory, and then enabled by linking to the other directory./etc/nginx/sites-enabled/: The directory where enabled per-site server blocks are stored. Typically, these are created by linking to configuration files found in thesites-availabledirectory./etc/nginx/snippets: This directory contains configuration fragments that can be included elsewhere in the Nginx configuration. Potentially repeatable configuration segments are good candidates for refactoring into snippets.
Server Logs
/var/log/nginx/access.log: Every request to your web server is recorded in this log file unless Nginx is configured to do otherwise./var/log/nginx/error.log: Any Nginx errors will be recorded in this log.
Conclusion
Now that you have your web server installed, you have many options for the type of content to serve and the technologies you want to use to create a richer experience.
If you’d like to build out a more complete application stack, check out the article How To Install Linux, Nginx, MySQL, PHP (LEMP stack) on Ubuntu 20.04.
In order to set up HTTPS for your domain name with a free SSL certificate using Let’s Encrypt, you should move on to How To Secure Nginx with Let’s Encrypt on Ubuntu 20.04.
How To Install and Secure Redis on Ubuntu 20.04
Published on May 1, 2020 · Updated on May 2, 2020
Introduction
Redis is an in-memory key-value store known for its flexibility, performance, and wide language support. This tutorial demonstrates how to install, configure, and secure Redis on an Ubuntu 20.04 server.
Prerequisites
To complete this guide, you will need access to an Ubuntu 20.04 server that has a non-root user with sudo privileges and a firewall configured with ufw. You can set this up by following our Initial Server Setup guide for Ubuntu 20.04.
Step 1 — Installing and Configuring Redis
We’ll use the APT package manager to install redis from the official Ubuntu repositories. As of this writing, the version available in the default repositories is 5.0.7.
Begin by updating your local apt package cache:
sudo apt update
Then install Redis by typing:
sudo apt install redis-server
This will download and install Redis and its dependencies. Following this, there is one important configuration change to make in the Redis configuration file, which was generated automatically during the installation.
Open this file with your preferred text editor:
sudo nano /etc/redis/redis.conf
Inside the file, find the supervised directive. This directive allows you to declare an init system to manage Redis as a service, providing you with more control over its operation. The supervised directive is set to no by default. Since you are running Ubuntu, which uses the systemd init system, change this to systemd:
. . .

# If you run Redis from upstart or systemd, Redis can interact with your
# supervision tree. Options:
#   supervised no      - no supervision interaction
#   supervised upstart - signal upstart by putting Redis into SIGSTOP mode
#   supervised systemd - signal systemd by writing READY=1 to $NOTIFY_SOCKET
#   supervised auto    - detect upstart or systemd method based on
#                        UPSTART_JOB or NOTIFY_SOCKET environment variables
# Note: these supervision methods only signal "process is ready."
#       They do not enable continuous liveness pings back to your supervisor.
supervised systemd

. . .
That’s the only change you need to make to the Redis configuration file at this point, so save and close it when you are finished. If you used nano to edit the file, do so by pressing CTRL + X, Y, then ENTER.
Then, restart the Redis service to reflect the changes you made to the configuration file:
sudo systemctl restart redis.service
With that, you’ve installed and configured Redis and it’s running on your machine. Before you begin using it, though, it’s prudent to first check whether Redis is functioning correctly.
Step 2 — Testing Redis
As with any newly-installed software, it’s a good idea to ensure that Redis is functioning as expected before making any further changes to its configuration. We will go over a handful of ways to check that Redis is working correctly in this step.
Start by checking that the Redis service is running:
sudo systemctl status redis
If it is running without any errors, this command will produce output similar to the following:
Output
● redis-server.service - Advanced key-value store
     Loaded: loaded (/lib/systemd/system/redis-server.service; enabled; vendor preset: enabled)
     Active: active (running) since Thu 2020-04-30 23:26:54 UTC; 4s ago
       Docs: http://redis.io/documentation,
             man:redis-server(1)
    Process: 36552 ExecStart=/usr/bin/redis-server /etc/redis/redis.conf (code=exited, status=0/SUCCESS)
   Main PID: 36561 (redis-server)
      Tasks: 4 (limit: 2345)
     Memory: 1.8M
     CGroup: /system.slice/redis-server.service
             └─36561 /usr/bin/redis-server 127.0.0.1:6379
. . .
Here, you can see that Redis is running and is already enabled, meaning that it is set to start up every time the server boots.
Note: This setting is desirable for many common use cases of Redis. If, however, you prefer to start up Redis manually every time your server boots, you can configure this with the following command:
sudo systemctl disable redis
To test that Redis is functioning correctly, connect to the server using redis-cli, Redis’s command-line client:
redis-cli
In the prompt that follows, test connectivity with the ping command:
ping
Output
PONG
This output confirms that the server connection is still alive. Next, check that you’re able to set keys by running:
set test "It's working!"
Output
OK
Retrieve the value by typing:
get test
Assuming everything is working, you will be able to retrieve the value you stored:
Output
"It's working!"
After confirming that you can fetch the value, exit the Redis prompt to get back to the shell:
exit
As a final test, we will check whether Redis is able to persist data even after it’s been stopped or restarted. To do this, first restart the Redis instance:
sudo systemctl restart redis
Then connect with the command-line client again:
redis-cli
And confirm that your test value is still available
get test
The value of your key should still be accessible:
Output
"It's working!"
Exit out into the shell again when you are finished:
exit
With that, your Redis installation is fully operational and ready for you to use. However, some of its default configuration settings are insecure and provide malicious actors with opportunities to attack and gain access to your server and its data. The remaining steps in this tutorial cover methods for mitigating these vulnerabilities, as prescribed by the official Redis website. Although these steps are optional and Redis will still function if you choose not to follow them, it is strongly recommended that you complete them in order to harden your system’s security.
Step 3 — Binding to localhost
By default, Redis is only accessible from localhost. However, if you installed and configured Redis by following a different tutorial than this one, you might have updated the configuration file to allow connections from anywhere. This is not as secure as binding to localhost.
To correct this, open the Redis configuration file for editing:
sudo nano /etc/redis/redis.conf
Locate this line and make sure it is uncommented (remove the # if it exists):
/etc/redis/redis.conf
bind 127.0.0.1 ::1
Save and close the file when finished (press CTRL + X, Y, then ENTER).
Then, restart the service to ensure that systemd reads your changes:
sudo systemctl restart redis
To check that this change has gone into effect, run the following netstat command:
sudo netstat -lnp | grep redis
Outputtcp        0      0 127.0.0.1:6379          0.0.0.0:*               LISTEN      14222/redis-server
tcp6       0      0 ::1:6379                :::*                    LISTEN      14222/redis-server
Note: The netstat command may not be available on your system by default. If this is the case, you can install it (along with a number of other handy networking tools) with the following command:
sudo apt install net-tools
This output shows that the redis-server program is bound to localhost (127.0.0.1), reflecting the change you just made to the configuration file. If you see another IP address in that column (0.0.0.0, for example), then you should double check that you uncommented the correct line and restart the Redis service again.
Now that your Redis installation is only listening in on localhost, it will be more difficult for malicious actors to make requests or gain access to your server. However, Redis isn’t currently set to require users to authenticate themselves before making changes to its configuration or the data it holds. To remedy this, Redis allows you to require users to authenticate with a password before making changes via the Redis client (redis-cli).
Step 4 — Configuring a Redis Password
Configuring a Redis password enables one of its two built-in security features — the auth command, which requires clients to authenticate to access the database. The password is configured directly in Redis’s configuration file, /etc/redis/redis.conf, so open that file again with your preferred editor:
sudo nano /etc/redis/redis.conf
Scroll to the SECURITY section and look for a commented directive that reads:
/etc/redis/redis.conf
. . .
# requirepass foobared
. . .
Uncomment it by removing the #, and change foobared to a secure password.
Note: Above the requirepass directive in the redis.conf file, there is a commented warning:
/etc/redis/redis.conf
. . .
# Warning: since Redis is pretty fast an outside user can try up to
# 150k passwords per second against a good box. This means that you should
# use a very strong password otherwise it will be very easy to break.
#
. . .
Thus, it’s important that you specify a very strong and very long value as your password. Rather than make up a password yourself, you can use the openssl command to generate a random one, as in the following example. By piping the output of the first command to the second openssl command, as shown here, it will remove any line breaks produced by that the first command:
openssl rand 60 | openssl base64 -A
Your output should look something like:
Output
RBOJ9cCNoGCKhlEBwQLHri1g+atWgn4Xn4HwNUbtzoVxAYxkiYBi7aufl4MILv1nxBqR4L6NNzI0X6cE
After copying and pasting the output of that command as the new value for requirepass, it should read:
/etc/redis/redis.confrequirepass RBOJ9cCNoGCKhlEBwQLHri1g+atWgn4Xn4HwNUbtzoVxAYxkiYBi7aufl4MILv1nxBqR4L6NNzI0X6cE
After setting the password, save and close the file, then restart Redis:
sudo systemctl restart redis.service
To test that the password works, open up the Redis client:
redis-cli
The following shows a sequence of commands used to test whether the Redis password works. The first command tries to set a key to a value before authentication:
set key1 10
That won’t work because you didn’t authenticate, so Redis returns an error:
Output
(error) NOAUTH Authentication required.
The next command authenticates with the password specified in the Redis configuration file:
auth your_redis_password
Redis acknowledges:
Output
OK
After that, running the previous command again will succeed:
set key1 10
Output
OK
get key1 queries Redis for the value of the new key.
get key1
Output
"10"
After confirming that you’re able to run commands in the Redis client after authenticating, you can exit redis-cli:
quit
Next, we’ll look at renaming Redis commands which, if entered by mistake or by a malicious actor, could cause serious damage to your machine.
Step 5 — Renaming Dangerous Commands
The other security feature built into Redis involves renaming or completely disabling certain commands that are considered dangerous.
When run by unauthorized users, such commands can be used to reconfigure, destroy, or otherwise wipe your data. Like the authentication password, renaming or disabling commands is configured in the same SECURITY section of the /etc/redis/redis.conf file.
Some of the commands that are considered dangerous include: FLUSHDB, FLUSHALL, KEYS, PEXPIRE, DEL, CONFIG, SHUTDOWN, BGREWRITEAOF, BGSAVE, SAVE, SPOP, SREM, RENAME, and DEBUG. This is not a comprehensive list, but renaming or disabling all of the commands in that list is a good starting point for enhancing your Redis server’s security.
Whether you should disable or rename a command depends on your specific needs or those of your site. If you know you will never use a command that could be abused, then you may disable it. Otherwise, it might be in your best interest to rename it.
To rename or disable Redis commands, open the configuration file once more:
sudo nano /etc/redis/redis.conf
Warning: The following steps showing how to disable and rename commands are examples. You should only choose to disable or rename the commands that make sense for you. You can review the full list of commands for yourself and determine how they might be misused at redis.io/commands.
To disable a command, simply rename it to an empty string (signified by a pair of quotation marks with no characters between them), as shown below:
/etc/redis/redis.conf
. . .
# It is also possible to completely kill a command by renaming it into
# an empty string:
#
rename-command FLUSHDB ""
rename-command FLUSHALL ""
rename-command DEBUG ""
. . .
To rename a command, give it another name as shown in the examples below. Renamed commands should be difficult for others to guess, but easy for you to remember:
/etc/redis/redis.conf
. . .
# rename-command CONFIG ""
rename-command SHUTDOWN SHUTDOWN_MENOT
rename-command CONFIG ASC12_CONFIG
. . .
Save your changes and close the file.
After renaming a command, apply the change by restarting Redis:
sudo systemctl restart redis.service
To test the new command, enter the Redis command line:
redis-cli
Then, authenticate:
auth your_redis_password
Output
OK
Let’s assume that you renamed the CONFIG command to ASC12_CONFIG, as in the preceding example. First, try using the original CONFIG command. It should fail, because you’ve renamed it:
config get requirepass
Output
(error) ERR unknown command `config`, with args beginning with:
Calling the renamed command, however, will be successful. It is not case-sensitive:
asc12_config get requirepass
Output
1) "requirepass"
2) "your_redis_password"
Finally, you can exit from redis-cli:
exit
Note that if you’re already using the Redis command line and then restart Redis, you’ll need to re-authenticate. Otherwise, you’ll get this error if you type a command:
Output
NOAUTH Authentication required.
Regarding the practice of renaming commands, there’s a cautionary statement at the end of the SECURITY section in /etc/redis/redis.conf which reads:
/etc/redis/redis.conf
. . .
# Please note that changing the name of commands that are logged into the
# AOF file or transmitted to replicas may cause problems.
. . .
Note: The Redis project chooses to use the terms “master” and “slave,” while DigitalOcean generally prefers the alternatives “primary” and “secondary.” In order to avoid confusion we’ve chosen to use the terms used in the Redis documentation here.
That means if the renamed command is not in the AOF file, or if it is but the AOF file has not been transmitted to slaves, then there should be no problem.
So, keep that in mind when you’re trying to rename commands. The best time to rename a command is when you’re not using AOF persistence, or right after installation, that is, before your Redis-using application has been deployed.
When you’re using AOF and dealing with a master-slave installation, consider this answer from the project’s GitHub issue page. The following is a reply to the author’s question:
The commands are logged to the AOF and replicated to the slave the same way they are sent, so if you try to replay the AOF on an instance that doesn’t have the same renaming, you may face inconsistencies as the command cannot be executed (same for slaves).
Thus, the best way to handle renaming in cases like that is to make sure that renamed commands are applied to all instances in master-slave installations.
Conclusion
In this tutorial, you installed and configured Redis, validated that your Redis installation is functioning correctly, and used its built-in security features to make it less vulnerable to attacks from malicious actors.
Keep in mind that once someone is logged in to your server, it’s very easy to circumvent the Redis-specific security features we’ve put in place. Therefore, the most important security feature on your Redis server is your firewall (which you configured if you followed the prerequisite Initial Server Setup tutorial), as this makes it extremely difficult for malicious actors to jump that fence.
systemctl命令介绍和使用
Systemd程序
Systemd其实是Linux系统用来管理系统的一个程序,用来代替原来的init进程(用来管理启动系统其它的服务进程),现在很多Linux发行版都已经自带Systemd程序了。
systemctl命令
1. Unit
systemctl命令是Systemd中最重要的一个命令,用于对服务进行启动,停止等操作,在Systemd中有Unit的概念,每个进程都是一个Unit,总共有十二种Unit类型。
- Service unit,系统服务
- Target unit,多个 Unit 构成的一个组
- Device Unit,硬件设备
- Mount Unit,文件系统的挂载点
- Automount Unit,自动挂载点
- Path Unit,文件或路径
- Scope Unit,不是由 Systemd 启动的外部进程
- Slice Unit,进程组
- Snapshot Unit,Systemd 快照,可以切回某个快照
- Socket Unit,进程间通信的 socket
- Swap Unit,swap 文件
- Timer Unit,定时器
2. 常用命令
# 列出正在运行的Unit
systemctl list-units,可以直接使用systemctl

# 列出所有Unit,包括没有找到配置文件的或者启动失败的
systemctl list-units --all

# 列出所有没有运行的 Unit
systemctl list-units --all --state=inactive

# 列出所有加载失败的 Unit
systemctl list-units --failed

# 列出所有正在运行的、类型为service的Unit
systemctl list-units --type=service

# 显示某个 Unit 是否正在运行
systemctl is-active application.service

# 显示某个 Unit 是否处于启动失败状态
systemctl is-failed application.service

# 显示某个 Unit 服务是否建立了启动链接
systemctl is-enabled application.service

# 立即启动一个服务
sudo systemctl start apache.service

# 立即停止一个服务
sudo systemctl stop apache.service

# 重启一个服务
sudo systemctl restart apache.service

# 重新加载一个服务的配置文件
sudo systemctl reload apache.service

# 重载所有修改过的配置文件
sudo systemctl daemon-reload
systemctl中Unit的配置文件
上面说了每个服务都是一个Unit,那每个Unit都会有它的配置文件,这样启动的时候才知道要按照什么方式去启动。Systemd默认从目录/etc/systemd/system/读取配置文件。但是里面存放的大部分文件都是符号链接,指向目录/usr/lib/systemd/system/,真正的配置文件存放在那个目录。
1. 查看Unit的配置文件
可以使用systemctl cat命令来查看服务的配置文件,下面是Mysql的配置文件,很多软件已经支持Systemd程序了,安装的时候会自动配置它的Unit配置文件,例如Mysql和Nginx等等。
[root@VM_0_11_centos ~]# systemctl cat mysqld
# /usr/lib/systemd/system/mysqld.service

[Unit]
Description=MySQL Server
Documentation=man:mysqld(8)
Documentation=http://dev.mysql.com/doc/refman/en/using-systemd.html
After=network.target
After=syslog.target

[Install]
WantedBy=multi-user.target

[Service]
User=mysql
Group=mysql
Type=forking
PIDFile=/var/run/mysqld/mysqld.pid
# Disable service start and stop timeout logic of systemd for mysqld service.
TimeoutSec=0
# Execute pre and post scripts as root
PermissionsStartOnly=true
# Needed to create system tables
ExecStartPre=/usr/bin/mysqld_pre_systemd
# Start main service
ExecStart=/usr/sbin/mysqld --daemonize --pid-file=/var/run/mysqld/mysqld.pid $MYSQLD_OPTS
# Use this to switch malloc implementation
EnvironmentFile=-/etc/sysconfig/mysql
# Sets open_files_limit
LimitNOFILE = 5000
Restart=on-failure
RestartPreventExitStatus=1
PrivateTmp=false
2. Unit配置文件的含义
可以看到Unit配置文件有很多标签,不同的标签都代表了不同的意思,这里只列出部分介绍,可以去官网查看Unit配置文件文档介绍,https://www.freedesktop.org/software/systemd/man/systemd.unit.html。
- Unit
   - Description,服务的描述
   - Documentation,文档介绍
   - After,该服务要在什么服务启动之后启动,比如Mysql需要在network和syslog启动之后再启动
- Install
   - WantedBy,值是一个或多个Target,当前Unit激活时(enable)符号链接会放入/etc/systemd/system目录下面以Target名+.wants后缀构成的子目录中
   - RequiredBy,它的值是一个或多个Target,当前Unit激活(enable)时,符号链接会放入/etc/systemd/system目录下面以Target名+.required后缀构成的子目录中
   - Alias,当前Unit可用于启动的别名
   - Also,当前Unit激活(enable)时,会被同时激活的其他Unit
- Service
   - Type,定义启动时的进程行为。它有以下几种值。
   - Type=simple,默认值,执行ExecStart指定的命令,启动主进程
   - Type=forking,以 fork 方式从父进程创建子进程,创建后父进程会立即退出
   - Type=oneshot,一次性进程,Systemd 会等当前服务退出,再继续往下执行
   - Type=dbus,当前服务通过D-Bus启动
   - Type=notify,当前服务启动完毕,会通知Systemd,再继续往下执行
   - Type=idle,若有其他任务执行完毕,当前服务才会运行
   - ExecStart,启动当前服务的命令
   - ExecStartPre,启动当前服务之前执行的命令
   - ExecStartPost,启动当前服务之后执行的命令
   - ExecReload,重启当前服务时执行的命令
   - ExecStop,停止当前服务时执行的命令
   - ExecStopPost,停止当其服务之后执行的命令
   - RestartSec,自动重启当前服务间隔的秒数
   - Restart,定义何种情况 Systemd 会自动重启当前服务,可能的值包括always(总是重启)、on-success、on-failure、on-abnormal、on-abort、on-watchdog
   - TimeoutSec,定义 Systemd 停止当前服务之前等待的秒数
   - Environment,指定环境变量
自定义服务启动
既然Systemd的作用就是控制服务的启动,那么就可以把自己的服务添加进去,就可以直接使用systemctl命令来控制服务的启动,或者是设置开机自动启动等等。
1. 创建Unit配置文件
在/usr/lib/systemd/system目录中创建自己的配置文件,一般都是.service结尾,例如这里创建了一个test-sh.service配置文件,这个Unit是为了启动我们自己的一个shell脚本。
# /usr/lib/systemd/system/test-sh.service
[Unit]
Description= test sh log

[Service]
ExecStart=/opt/dev/shell/test.sh
Type=forking
KillMode=process
Restart=on-failure
RestartSec=30s

[Install]
WantedBy=multi-user.target
2. 创建脚本
在上面配置文件指定的启动路径/opt/dev/shell/下创建shell脚本,这里只是每秒打印当前时间,并输出到一个文本中。
#!/bin/bash
while true
do
sleep 1
 date=`date -d today +"%Y-%m-%d %T"`
 echo ${date} >> /opt/dev/shell/test.txt
done
3. 载入配置文件并启动
使用systemctl daemon-reload命令来载入新添加的配置文件,然后使用systemctl start test-sh.service命令启动,再使用systemctl status test-sh.service命令来查看状态,可以看到已经启动,/opt/dev/shell/test.txt也确实在不停的写入内容,最后使用systemctl stop test-sh.service命令停止服务,可以看到状态也是停止了。
注意的是修改配置文件后一定要使用systemctl daemon-reload命令来载入新添加的配置文件,然后再启动服务。
[root@VM_0_11_centos ~]# systemctl start test-sh.service
^C
[root@VM_0_11_centos ~]# systemctl status test-sh.service
● test-sh.service - test sh log
   Loaded: loaded (/usr/lib/systemd/system/test-sh.service; enabled; vendor preset: disabled)
   Active: activating (start) since Fri 2020-06-26 05:46:45 CST; 11s ago
   Control: 9295 (test.sh)
   CGroup: /system.slice/test-sh.service
       ├─9295 /bin/bash /opt/dev/shell/test.sh
       └─9343 sleep 1

Jun 26 05:46:45 VM_0_11_centos systemd[1]: Starting test sh log...
[root@VM_0_11_centos ~]# systemctl stop test-sh.service
[root@VM_0_11_centos ~]# systemctl status test-sh.service
● test-sh.service - test sh log
   Loaded: loaded (/usr/lib/systemd/system/test-sh.service; enabled; vendor preset: disabled)
   Active: inactive (dead) since Fri 2020-06-26 05:47:52 CST; 2s ago
  Process: 9295 ExecStart=/opt/dev/shell/test.sh (code=killed, signal=TERM)

Jun 26 05:46:45 VM_0_11_centos systemd[1]: Starting test sh log...
Jun 26 05:47:52 VM_0_11_centos systemd[1]: Stopped test sh log.
查看Unit启动日志
Systemd统一管理了所有Unit的启动日志,因此只需要使用journalctl命令就可以查看到服务的日志
# 查看所有日志(默认情况下 ,只保存本次启动的日志)
journalctl

# 查看指定时间的日志
journalctl --since="2012-10-30 18:17:16"
journalctl --since "20 min ago"
journalctl --since yesterday
journalctl --since "2015-01-10" --until "2015-01-11 03:00"
journalctl --since 09:00 --until "1 hour ago"

# 显示尾部的最新10行日志
journalctl -n

# 显示尾部指定行数的日志
journalctl -n 20

# 实时滚动显示最新日志
journalctl -f

# 查看指定服务的日志
journalctl /usr/lib/systemd/systemd

# 查看指定进程的日志
journalctl _PID=1

# 查看某个路径的脚本的日志
journalctl /usr/bin/bash

# 查看指定用户的日志
journalctl _UID=33 --since today

# 查看某个 Unit 的日志
journalctl -u nginx.service
journalctl -u nginx.service --since today

# 实时滚动显示某个 Unit 的最新日志
journalctl -u nginx.service -f

# 合并显示多个 Unit 的日志
$ journalctl -u nginx.service -u php-fpm.service --since today
Systemd 入门教程:命令篇
Systemd 是 Linux 系统工具,用来启动守护进程,已成为大多数发行版的标准配置。
本文介绍它的基本用法,分为上下两篇。今天介绍它的主要命令,下一篇介绍如何用于实战。
一、由来
下面的命令用来启动服务。
$ sudo /etc/init.d/apache2 start
# 或者
$ service apache2 start
这种方法有两个缺点。
一是启动时间长。init进程是串行启动,只有前一个进程启动完,才会启动下一个进程。
二是启动脚本复杂。init进程只是执行启动脚本,不管其他事情。脚本需要自己处理各种情况,这往往使得脚本变得很长。
二、Systemd 概述
Systemd 就是为了解决这些问题而诞生的。它的设计目标是,为系统的启动和管理提供一套完整的解决方案。
根据 Linux 惯例,字母d是守护进程(daemon)的缩写。 Systemd 这个名字的含义,就是它要守护整个系统。
使用了 Systemd,就不需要再用init了。Systemd 取代了initd,成为系统的第一个进程(PID 等于 1),其他进程都是它的子进程。
$ systemctl --version
上面的命令查看 Systemd 的版本。
Systemd 的优点是功能强大,使用方便,缺点是体系庞大,非常复杂。事实上,现在还有很多人反对使用 Systemd,理由就是它过于复杂,与操作系统的其他部分强耦合,违反"keep simple, keep stupid"的Unix 哲学。
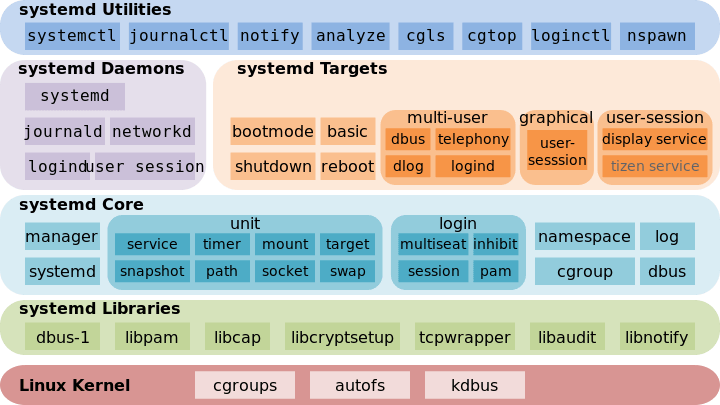
(上图为 Systemd 架构图)
三、系统管理
Systemd 并不是一个命令,而是一组命令,涉及到系统管理的方方面面。
3.1 systemctl
systemctl是 Systemd 的主命令,用于管理系统。
# 重启系统
$ sudo systemctl reboot

# 关闭系统,切断电源
$ sudo systemctl poweroff

# CPU停止工作
$ sudo systemctl halt

# 暂停系统
$ sudo systemctl suspend

# 让系统进入冬眠状态
$ sudo systemctl hibernate

# 让系统进入交互式休眠状态
$ sudo systemctl hybrid-sleep

# 启动进入救援状态(单用户状态)
$ sudo systemctl rescue
3.2 systemd-analyze
systemd-analyze命令用于查看启动耗时。
# 查看启动耗时
$ systemd-analyze

# 查看每个服务的启动耗时
$ systemd-analyze blame

# 显示瀑布状的启动过程流
$ systemd-analyze critical-chain

# 显示指定服务的启动流
$ systemd-analyze critical-chain atd.service
3.3 hostnamectl
hostnamectl命令用于查看当前主机的信息。
# 显示当前主机的信息
$ hostnamectl

# 设置主机名。
$ sudo hostnamectl set-hostname rhel7
3.4 localectl
localectl命令用于查看本地化设置。
# 查看本地化设置
$ localectl

# 设置本地化参数。
$ sudo localectl set-locale LANG=en_GB.utf8
$ sudo localectl set-keymap en_GB
3.5 timedatectl
timedatectl命令用于查看当前时区设置。
# 查看当前时区设置
$ timedatectl

# 显示所有可用的时区
$ timedatectl list-timezones

# 设置当前时区
$ sudo timedatectl set-timezone America/New_York
$ sudo timedatectl set-time YYYY-MM-DD
$ sudo timedatectl set-time HH:MM:SS
3.6 loginctl
loginctl命令用于查看当前登录的用户。
# 列出当前session
$ loginctl list-sessions

# 列出当前登录用户
$ loginctl list-users

# 列出显示指定用户的信息
$ loginctl show-user ruanyf
四、Unit
4.1 含义
Systemd 可以管理所有系统资源。不同的资源统称为 Unit(单位)。
Unit 一共分成12种。
- Service unit:系统服务
- Target unit:多个 Unit 构成的一个组
- Device Unit:硬件设备
- Mount Unit:文件系统的挂载点
- Automount Unit:自动挂载点
- Path Unit:文件或路径
- Scope Unit:不是由 Systemd 启动的外部进程
- Slice Unit:进程组
- Snapshot Unit:Systemd 快照,可以切回某个快照
- Socket Unit:进程间通信的 socket
- Swap Unit:swap 文件
- Timer Unit:定时器
systemctl list-units命令可以查看当前系统的所有 Unit 。
# 列出正在运行的 Unit
$ systemctl list-units

# 列出所有Unit,包括没有找到配置文件的或者启动失败的
$ systemctl list-units --all

# 列出所有没有运行的 Unit
$ systemctl list-units --all --state=inactive

# 列出所有加载失败的 Unit
$ systemctl list-units --failed

# 列出所有正在运行的、类型为 service 的 Unit
$ systemctl list-units --type=service
4.2 Unit 的状态
systemctl status命令用于查看系统状态和单个 Unit 的状态。
# 显示系统状态
$ systemctl status

# 显示单个 Unit 的状态
$ sysystemctl status bluetooth.service

# 显示远程主机的某个 Unit 的状态
$ systemctl -H root@rhel7.example.com status httpd.service
除了status命令,systemctl还提供了三个查询状态的简单方法,主要供脚本内部的判断语句使用。
# 显示某个 Unit 是否正在运行
$ systemctl is-active application.service

# 显示某个 Unit 是否处于启动失败状态
$ systemctl is-failed application.service

# 显示某个 Unit 服务是否建立了启动链接
$ systemctl is-enabled application.service
4.3 Unit 管理
对于用户来说,最常用的是下面这些命令,用于启动和停止 Unit(主要是 service)。
# 立即启动一个服务
$ sudo systemctl start apache.service

# 立即停止一个服务
$ sudo systemctl stop apache.service

# 重启一个服务
$ sudo systemctl restart apache.service

# 杀死一个服务的所有子进程
$ sudo systemctl kill apache.service

# 重新加载一个服务的配置文件
$ sudo systemctl reload apache.service

# 重载所有修改过的配置文件
$ sudo systemctl daemon-reload

# 显示某个 Unit 的所有底层参数
$ systemctl show httpd.service

# 显示某个 Unit 的指定属性的值
$ systemctl show -p CPUShares httpd.service

# 设置某个 Unit 的指定属性
$ sudo systemctl set-property httpd.service CPUShares=500
4.4 依赖关系
Unit 之间存在依赖关系:A 依赖于 B,就意味着 Systemd 在启动 A 的时候,同时会去启动 B。
systemctl list-dependencies命令列出一个 Unit 的所有依赖。
$ systemctl list-dependencies nginx.service
上面命令的输出结果之中,有些依赖是 Target 类型(详见下文),默认不会展开显示。如果要展开 Target,就需要使用--all参数。
$ systemctl list-dependencies --all nginx.service
五、Unit 的配置文件
5.1 概述
每一个 Unit 都有一个配置文件,告诉 Systemd 怎么启动这个 Unit 。
Systemd 默认从目录/etc/systemd/system/读取配置文件。但是,里面存放的大部分文件都是符号链接,指向目录/usr/lib/systemd/system/,真正的配置文件存放在那个目录。
systemctl enable命令用于在上面两个目录之间,建立符号链接关系。
$ sudo systemctl enable clamd@scan.service
# 等同于
$ sudo ln -s '/usr/lib/systemd/system/clamd@scan.service' '/etc/systemd/system/multi-user.target.wants/clamd@scan.service'
如果配置文件里面设置了开机启动,systemctl enable命令相当于激活开机启动。
与之对应的,systemctl disable命令用于在两个目录之间,撤销符号链接关系,相当于撤销开机启动。
$ sudo systemctl disable clamd@scan.service
配置文件的后缀名,就是该 Unit 的种类,比如sshd.socket。如果省略,Systemd 默认后缀名为.service,所以sshd会被理解成sshd.service。
5.2 配置文件的状态
systemctl list-unit-files命令用于列出所有配置文件。
# 列出所有配置文件
$ systemctl list-unit-files

# 列出指定类型的配置文件
$ systemctl list-unit-files --type=service
这个命令会输出一个列表。
$ systemctl list-unit-files

UNIT FILE              STATE
chronyd.service        enabled
clamd@.service         static
clamd@scan.service     disabled
这个列表显示每个配置文件的状态,一共有四种。
- enabled:已建立启动链接
- disabled:没建立启动链接
- static:该配置文件没有
[Install]部分(无法执行),只能作为其他配置文件的依赖 - masked:该配置文件被禁止建立启动链接
注意,从配置文件的状态无法看出,该 Unit 是否正在运行。这必须执行前面提到的systemctl status命令。
$ systemctl status bluetooth.service
一旦修改配置文件,就要让 SystemD 重新加载配置文件,然后重新启动,否则修改不会生效。
$ sudo systemctl daemon-reload
$ sudo systemctl restart httpd.service
5.3 配置文件的格式
配置文件就是普通的文本文件,可以用文本编辑器打开。
systemctl cat命令可以查看配置文件的内容。
$ systemctl cat atd.service

[Unit]
Description=ATD daemon

[Service]
Type=forking
ExecStart=/usr/bin/atd

[Install]
WantedBy=multi-user.target
从上面的输出可以看到,配置文件分成几个区块。每个区块的第一行,是用方括号表示的区别名,比如[Unit]。注意,配置文件的区块名和字段名,都是大小写敏感的。
每个区块内部是一些等号连接的键值对。
[Section]
Directive1=value
Directive2=value

. . .
注意,键值对的等号两侧不能有空格。
5.4 配置文件的区块
[Unit]区块通常是配置文件的第一个区块,用来定义 Unit 的元数据,以及配置与其他 Unit 的关系。它的主要字段如下。
Description:简短描述Documentation:文档地址Requires:当前 Unit 依赖的其他 Unit,如果它们没有运行,当前 Unit 会启动失败Wants:与当前 Unit 配合的其他 Unit,如果它们没有运行,当前 Unit 不会启动失败BindsTo:与Requires类似,它指定的 Unit 如果退出,会导致当前 Unit 停止运行Before:如果该字段指定的 Unit 也要启动,那么必须在当前 Unit 之后启动After:如果该字段指定的 Unit 也要启动,那么必须在当前 Unit 之前启动Conflicts:这里指定的 Unit 不能与当前 Unit 同时运行Condition...:当前 Unit 运行必须满足的条件,否则不会运行Assert...:当前 Unit 运行必须满足的条件,否则会报启动失败
[Install]通常是配置文件的最后一个区块,用来定义如何启动,以及是否开机启动。它的主要字段如下。
WantedBy:它的值是一个或多个 Target,当前 Unit 激活时(enable)符号链接会放入/etc/systemd/system目录下面以 Target 名 +.wants后缀构成的子目录中RequiredBy:它的值是一个或多个 Target,当前 Unit 激活时,符号链接会放入/etc/systemd/system目录下面以 Target 名 +.required后缀构成的子目录中Alias:当前 Unit 可用于启动的别名Also:当前 Unit 激活(enable)时,会被同时激活的其他 Unit
[Service]区块用来 Service 的配置,只有 Service 类型的 Unit 才有这个区块。它的主要字段如下。
Type:定义启动时的进程行为。它有以下几种值。Type=simple:默认值,执行ExecStart指定的命令,启动主进程Type=forking:以 fork 方式从父进程创建子进程,创建后父进程会立即退出Type=oneshot:一次性进程,Systemd 会等当前服务退出,再继续往下执行Type=dbus:当前服务通过D-Bus启动Type=notify:当前服务启动完毕,会通知Systemd,再继续往下执行Type=idle:若有其他任务执行完毕,当前服务才会运行ExecStart:启动当前服务的命令ExecStartPre:启动当前服务之前执行的命令ExecStartPost:启动当前服务之后执行的命令ExecReload:重启当前服务时执行的命令ExecStop:停止当前服务时执行的命令ExecStopPost:停止当其服务之后执行的命令RestartSec:自动重启当前服务间隔的秒数Restart:定义何种情况 Systemd 会自动重启当前服务,可能的值包括always(总是重启)、on-success、on-failure、on-abnormal、on-abort、on-watchdogTimeoutSec:定义 Systemd 停止当前服务之前等待的秒数Environment:指定环境变量
Unit 配置文件的完整字段清单,请参考官方文档。
六、Target
启动计算机的时候,需要启动大量的 Unit。如果每一次启动,都要一一写明本次启动需要哪些 Unit,显然非常不方便。Systemd 的解决方案就是 Target。
简单说,Target 就是一个 Unit 组,包含许多相关的 Unit 。启动某个 Target 的时候,Systemd 就会启动里面所有的 Unit。从这个意义上说,Target 这个概念类似于"状态点",启动某个 Target 就好比启动到某种状态。
传统的init启动模式里面,有 RunLevel 的概念,跟 Target 的作用很类似。不同的是,RunLevel 是互斥的,不可能多个 RunLevel 同时启动,但是多个 Target 可以同时启动。
# 查看当前系统的所有 Target
$ systemctl list-unit-files --type=target

# 查看一个 Target 包含的所有 Unit
$ systemctl list-dependencies multi-user.target

# 查看启动时的默认 Target
$ systemctl get-default

# 设置启动时的默认 Target
$ sudo systemctl set-default multi-user.target

# 切换 Target 时,默认不关闭前一个 Target 启动的进程,
# systemctl isolate 命令改变这种行为,
# 关闭前一个 Target 里面所有不属于后一个 Target 的进程
$ sudo systemctl isolate multi-user.target
Target 与 传统 RunLevel 的对应关系如下。
Traditional runlevel      New target name     Symbolically linked to...

Runlevel 0           |    runlevel0.target -> poweroff.target
Runlevel 1           |    runlevel1.target -> rescue.target
Runlevel 2           |    runlevel2.target -> multi-user.target
Runlevel 3           |    runlevel3.target -> multi-user.target
Runlevel 4           |    runlevel4.target -> multi-user.target
Runlevel 5           |    runlevel5.target -> graphical.target
Runlevel 6           |    runlevel6.target -> reboot.target
它与init进程的主要差别如下。
(1)默认的 RunLevel(在/etc/inittab文件设置)现在被默认的 Target 取代,位置是/etc/systemd/system/default.target,通常符号链接到graphical.target(图形界面)或者multi-user.target(多用户命令行)。
(2)启动脚本的位置,以前是/etc/init.d目录,符号链接到不同的 RunLevel 目录 (比如/etc/rc3.d、/etc/rc5.d等),现在则存放在/lib/systemd/system和/etc/systemd/system目录。
(3)配置文件的位置,以前init进程的配置文件是/etc/inittab,各种服务的配置文件存放在/etc/sysconfig目录。现在的配置文件主要存放在/lib/systemd目录,在/etc/systemd目录里面的修改可以覆盖原始设置。
七、日志管理
Systemd 统一管理所有 Unit 的启动日志。带来的好处就是,可以只用journalctl一个命令,查看所有日志(内核日志和应用日志)。日志的配置文件是/etc/systemd/journald.conf。
journalctl功能强大,用法非常多。
# 查看所有日志(默认情况下 ,只保存本次启动的日志)
$ sudo journalctl

# 查看内核日志(不显示应用日志)
$ sudo journalctl -k

# 查看系统本次启动的日志
$ sudo journalctl -b
$ sudo journalctl -b -0

# 查看上一次启动的日志(需更改设置)
$ sudo journalctl -b -1

# 查看指定时间的日志
$ sudo journalctl --since="2012-10-30 18:17:16"
$ sudo journalctl --since "20 min ago"
$ sudo journalctl --since yesterday
$ sudo journalctl --since "2015-01-10" --until "2015-01-11 03:00"
$ sudo journalctl --since 09:00 --until "1 hour ago"

# 显示尾部的最新10行日志
$ sudo journalctl -n

# 显示尾部指定行数的日志
$ sudo journalctl -n 20

# 实时滚动显示最新日志
$ sudo journalctl -f

# 查看指定服务的日志
$ sudo journalctl /usr/lib/systemd/systemd

# 查看指定进程的日志
$ sudo journalctl _PID=1

# 查看某个路径的脚本的日志
$ sudo journalctl /usr/bin/bash

# 查看指定用户的日志
$ sudo journalctl _UID=33 --since today

# 查看某个 Unit 的日志
$ sudo journalctl -u nginx.service
$ sudo journalctl -u nginx.service --since today

# 实时滚动显示某个 Unit 的最新日志
$ sudo journalctl -u nginx.service -f

# 合并显示多个 Unit 的日志
$ journalctl -u nginx.service -u php-fpm.service --since today

# 查看指定优先级(及其以上级别)的日志,共有8级
# 0: emerg
# 1: alert
# 2: crit
# 3: err
# 4: warning
# 5: notice
# 6: info
# 7: debug
$ sudo journalctl -p err -b

# 日志默认分页输出,--no-pager 改为正常的标准输出
$ sudo journalctl --no-pager

# 以 JSON 格式(单行)输出
$ sudo journalctl -b -u nginx.service -o json

# 以 JSON 格式(多行)输出,可读性更好
$ sudo journalctl -b -u nginx.serviceqq
-o json-pretty

# 显示日志占据的硬盘空间
$ sudo journalctl --disk-usage

# 指定日志文件占据的最大空间
$ sudo journalctl --vacuum-size=1G

# 指定日志文件保存多久
$ sudo journalctl --vacuum-time=1years
How To Install MySQL on Ubuntu 20.04
Published on April 24, 2020 · Updated on July 12, 2022
Introduction
MySQL is an open-source database management system, commonly installed as part of the popular LAMP (Linux, Apache, MySQL, PHP/Python/Perl) stack. It implements the relational model and uses Structured Query Language (better known as SQL) to manage its data.
This tutorial will go over how to install MySQL version 8.0 on an Ubuntu 20.04 server. By completing it, you will have a working relational database that you can use to build your next website or application.
Prerequisites
To follow this tutorial, you will need:
- One Ubuntu 20.04 server with a non-root administrative user and a firewall configured with UFW. To set this up, follow our initial server setup guide for Ubuntu 20.04.
Step 1 — Installing MySQL
On Ubuntu 20.04, you can install MySQL using the APT package repository. At the time of this writing, the version of MySQL available in the default Ubuntu repository is version 8.0.27.
To install it, update the package index on your server if you’ve not done so recently:
sudo apt update
Then install the mysql-server package:
sudo apt install mysql-server
Ensure that the server is running using the systemctl start command:
sudo systemctl start mysql.service
These commands will install and start MySQL, but will not prompt you to set a password or make any other configuration changes. Because this leaves your installation of MySQL insecure, we will address this next.
Step 2 — Configuring MySQL
For fresh installations of MySQL, you’ll want to run the DBMS’s included security script. This script changes some of the less secure default options for things like remote root logins and sample users.
Warning: As of July 2022, an error will occur when you run the mysql_secure_installation script without some further configuration. The reason is that this script will attempt to set a password for the installation’s root MySQL account but, by default on Ubuntu installations, this account is not configured to connect using a password.
Prior to July 2022, this script would silently fail after attempting to set the root account password and continue on with the rest of the prompts. However, as of this writing the script will return the following error after you enter and confirm a password:
Output
... Failed! Error: SET PASSWORD has no significance for user 'root'@'localhost' as the authentication method used doesn't store authentication data in the MySQL server. Please consider using ALTER USER instead if you want to change authentication parameters.

New password:
This will lead the script into a recursive loop which you can only get out of by closing your terminal window.
Because the mysql_secure_installation script performs a number of other actions that are useful for keeping your MySQL installation secure, it’s still recommended that you run it before you begin using MySQL to manage your data. To avoid entering this recursive loop, though, you’ll need to first adjust how your root MySQL user authenticates.
First, open up the MySQL prompt:
sudo mysql
Then run the following ALTER USER command to change the root user’s authentication method to one that uses a password. The following example changes the authentication method to mysql_native_password:
ALTER USER 'root'@'localhost' IDENTIFIED WITH mysql_native_password BY 'password';
After making this change, exit the MySQL prompt:
exit
Following that, you can run the mysql_secure_installation script without issue.
Once the security script completes, you can then reopen MySQL and change the root user’s authentication method back to the default, auth_socket. To authenticate as the root MySQL user using a password, run this command:
mysql -u root -p
Then go back to using the default authentication method using this command:
ALTER USER 'root'@'localhost' IDENTIFIED WITH auth_socket;
This will mean that you can once again connect to MySQL as your root user using the sudo mysql command.
Run the security script with sudo:
sudo mysql_secure_installation
This will take you through a series of prompts where you can make some changes to your MySQL installation’s security options. The first prompt will ask whether you’d like to set up the Validate Password Plugin, which can be used to test the password strength of new MySQL users before deeming them valid.
If you elect to set up the Validate Password Plugin, any MySQL user you create that authenticates with a password will be required to have a password that satisfies the policy you select. The strongest policy level — which you can select by entering 2 — will require passwords to be at least eight characters long and include a mix of uppercase, lowercase, numeric, and special characters:
OutputSecuring the MySQL server deployment.

Connecting to MySQL using a blank password.

VALIDATE PASSWORD COMPONENT can be used to test passwords
and improve security. It checks the strength of password
and allows the users to set only those passwords which are
secure enough. Would you like to setup VALIDATE PASSWORD component?

Press y|Y for Yes, any other key for No: Y

There are three levels of password validation policy:

LOW    Length >= 8
MEDIUM Length >= 8, numeric, mixed case, and special characters
STRONG Length >= 8, numeric, mixed case, special characters and dictionary                  file

Please enter 0 = LOW, 1 = MEDIUM and 2 = STRONG:
 2
Regardless of whether you choose to set up the Validate Password Plugin, the next prompt will be to set a password for the MySQL root user. Enter and then confirm a secure password of your choice:
OutputPlease set the password for root here.


New password:

Re-enter new password:
Note that even though you’ve set a password for the root MySQL user, this user is not currently configured to authenticate with a password when connecting to the MySQL shell.
If you used the Validate Password Plugin, you’ll receive feedback on the strength of your new password. Then the script will ask if you want to continue with the password you just entered or if you want to enter a new one. Assuming you’re satisfied with the strength of the password you just entered, enter Y to continue the script:
OutputEstimated strength of the password: 100
Do you wish to continue with the password provided?(Press y|Y for Yes, any other key for No) : Y
From there, you can press Y and then ENTER to accept the defaults for all the subsequent questions. This will remove some anonymous users and the test database, disable remote root logins, and load these new rules so that MySQL immediately respects the changes you have made.
Once the script completes, your MySQL installation will be secured. You can now move on to creating a dedicated database user with the MySQL client.
Step 3 — Creating a Dedicated MySQL User and Granting Privileges
Upon installation, MySQL creates a root user account which you can use to manage your database. This user has full privileges over the MySQL server, meaning it has complete control over every database, table, user, and so on. Because of this, it’s best to avoid using this account outside of administrative functions. This step outlines how to use the root MySQL user to create a new user account and grant it privileges.
In Ubuntu systems running MySQL 5.7 (and later versions), the root MySQL user is set to authenticate using the auth_socket plugin by default rather than with a password. This plugin requires that the name of the operating system user that invokes the MySQL client matches the name of the MySQL user specified in the command, so you must invoke mysql with sudo privileges to gain access to the root MySQL user:
sudo mysql
Note: If you installed MySQL with another tutorial and enabled password authentication for root, you will need to use a different command to access the MySQL shell. The following will run your MySQL client with regular user privileges, and you will only gain administrator privileges within the database by authenticating:
mysql -u root -p
Once you have access to the MySQL prompt, you can create a new user with a CREATE USER statement. These follow this general syntax:
CREATE USER 'username'@'host' IDENTIFIED WITH authentication_plugin BY 'password';
After CREATE USER, you specify a username. This is immediately followed by an @ sign and then the hostname from which this user will connect. If you only plan to access this user locally from your Ubuntu server, you can specify localhost. Wrapping both the username and host in single quotes isn’t always necessary, but doing so can help to prevent errors.
You have several options when it comes to choosing your user’s authentication plugin. The auth_socket plugin mentioned previously can be convenient, as it provides strong security without requiring valid users to enter a password to access the database. But it also prevents remote connections, which can complicate things when external programs need to interact with MySQL.
As an alternative, you can leave out the WITH authentication_plugin portion of the syntax entirely to have the user authenticate with MySQL’s default plugin, caching_sha2_password. The MySQL documentation recommends this plugin for users who want to log in with a password due to its strong security features.
Run the following command to create a user that authenticates with caching_sha2_password. Be sure to change sammy to your preferred username and password to a strong password of your choosing:
CREATE USER 'sammy'@'localhost' IDENTIFIED BY 'password';
Note: There is a known issue with some versions of PHP that causes problems with caching_sha2_password. If you plan to use this database with a PHP application — phpMyAdmin, for example — you may want to create a user that will authenticate with the older, though still secure, mysql_native_password plugin instead:
CREATE USER 'sammy'@'localhost' IDENTIFIED WITH mysql_native_password BY 'password';
If you aren’t sure, you can always create a user that authenticates with caching_sha2_plugin and then ALTER it later on with this command:
ALTER USER 'sammy'@'localhost' IDENTIFIED WITH mysql_native_password BY 'password';
After creating your new user, you can grant them the appropriate privileges. The general syntax for granting user privileges is as follows:
GRANT PRIVILEGE ON database.table TO 'username'@'host';
The PRIVILEGE value in this example syntax defines what actions the user is allowed to perform on the specified database and table. You can grant multiple privileges to the same user in one command by separating each with a comma. You can also grant a user privileges globally by entering asterisks (*) in place of the database and table names. In SQL, asterisks are special characters used to represent “all” databases or tables.
To illustrate, the following command grants a user global privileges to CREATE, ALTER, and DROP databases, tables, and users, as well as the power to INSERT, UPDATE, and DELETE data from any table on the server. It also grants the user the ability to query data with SELECT, create foreign keys with the REFERENCES keyword, and perform FLUSH operations with the RELOAD privilege. However, you should only grant users the permissions they need, so feel free to adjust your own user’s privileges as necessary.
You can find the full list of available privileges in the official MySQL documentation.
Run this GRANT statement, replacing sammy with your own MySQL user’s name, to grant these privileges to your user:
GRANT CREATE, ALTER, DROP, INSERT, UPDATE, DELETE, SELECT, REFERENCES, RELOAD on *.* TO 'sammy'@'localhost' WITH GRANT OPTION;
Note that this statement also includes WITH GRANT OPTION. This will allow your MySQL user to grant any permissions that it has to other users on the system.
Warning: Some users may want to grant their MySQL user the ALL PRIVILEGES privilege, which will provide them with broad superuser privileges akin to the root user’s privileges, like so:
GRANT ALL PRIVILEGES ON *.* TO 'sammy'@'localhost' WITH GRANT OPTION;
Such broad privileges should not be granted lightly, as anyone with access to this MySQL user will have complete control over every database on the server.
Following this, it’s good practice to run the FLUSH PRIVILEGES command. This will free up any memory that the server cached as a result of the preceding CREATE USER and GRANT statements:
FLUSH PRIVILEGES;
Then you can exit the MySQL client:
exit
In the future, to log in as your new MySQL user, you’d use a command like the following:
mysql -u sammy -p
The -p flag will cause the MySQL client to prompt you for your MySQL user’s password in order to authenticate.
Finally, let’s test the MySQL installation.
Step 4 — Testing MySQL
Regardless of how you installed it, MySQL should have started running automatically. To test this, check its status.
systemctl status mysql.service
You’ll see output similar to the following:
Output
● mysql.service - MySQL Community Server
     Loaded: loaded (/lib/systemd/system/mysql.service; enabled; vendor preset: enabled)
     Active: active (running) since Tue 2020-04-21 12:56:48 UTC; 6min ago
   Main PID: 10382 (mysqld)
     Status: "Server is operational"
      Tasks: 39 (limit: 1137)
     Memory: 370.0M
     CGroup: /system.slice/mysql.service
             └─10382 /usr/sbin/mysqld
If MySQL isn’t running, you can start it with sudo systemctl start mysql.
For an additional check, you can try connecting to the database using the mysqladmin tool, which is a client that lets you run administrative commands. For example, this command says to connect as a MySQL user named sammy (-u sammy), prompt for a password (-p), and return the version. Be sure to change sammy to the name of your dedicated MySQL user, and enter that user’s password when prompted:
sudo mysqladmin -p -u sammy version
You should see output similar to this:
Outputmysqladmin  Ver 8.0.19-0ubuntu5 for Linux on x86_64 ((Ubuntu))
Copyright (c) 2000, 2020, Oracle and/or its affiliates. All rights reserved.

Oracle is a registered trademark of Oracle Corporation and/or its
affiliates. Other names may be trademarks of their respective
owners.

Server version        8.0.19-0ubuntu5
Protocol version    10
Connection        Localhost via UNIX socket
UNIX socket        /var/run/mysqld/mysqld.sock
Uptime:            10 min 44 sec

Threads: 2  Questions: 25  Slow queries: 0  Opens: 149  Flush tables: 3  Open tables: 69  Queries per second avg: 0.038
This means MySQL is up and running.
Conclusion
You now have a basic MySQL setup installed on your server. Here are a few examples of next steps you can take:
- Set up a LAMP stack or a LEMP stack
- Practice running queries with SQL
- Manage your MySQL installation with phpMyAdmin
Linux中的Grep命令使用实例
在本教程中,您将学习如何在Linux中使用非常重要的grep命令。我们将讨论为什么此命令至关重要,以及如何在命令行中将其用于日常任务中。让我们深入了解一些解释和示例。
我们为什么要使用grep?
Grep是Linux用户用来搜索文本字符串的命令行工具。您可以使用它在文件中搜索某个单词或单词的组合,也可以将其他Linux命令的输出通过管道传输到grep,因此grep可以仅显示您需要查看的输出。
让我们看一些非常常见的例子,假设您需要检查目录的内容以查看那里是否存在某个文件,那就是您要使用“ ls”命令进行操作的目的。
但是,为了使检查目录内容的整个过程更快,您可以将ls命令的输出传递给grep命令,让我们在主目录中查找一个名为Documents的文件夹。
现在,让我们尝试再次检查目录,但是这次使用grep专门检查Documents文件夹。
$ ls | grep Documents
如您在上面的屏幕截图中所见,使用grep命令可以通过快速将搜索到的单词与ls命令产生的其余不必要输出隔离开来,从而节省了我们的时间。
如果“Documents”文件夹不存在,则grep不会返回任何输出。因此,如果grep没有返回任何内容,则意味着它找不到您正在搜索的单词。

查找字符串
如果您需要搜索文本字符串而不是单个单词,则需要将字符串用引号引起来。例如,如果我们需要搜索“My Documents”目录而不是单词“Documents”目录怎么办?
$ ls | grep 'My Documents'
grep的字符串Grep会同时接受单引号和双引号,因此请用其中任意一个将文本字符串包裹起来。
虽然grep通常用于搜索从其他命令行工具管道传输的输出,但是您也可以使用它直接搜索文档。下面是一个我们在文本文档中搜索字符串的示例。
$ grep 'Class 1' Students.txt
查找多个字符串
您也可以使用grep查找多个单词或字符串。您可以使用-e开关指定多个模式。让我们尝试在文本文档中搜索两个不同的字符串:
$ grep -e 'Class 1' -e Todd Students.txt
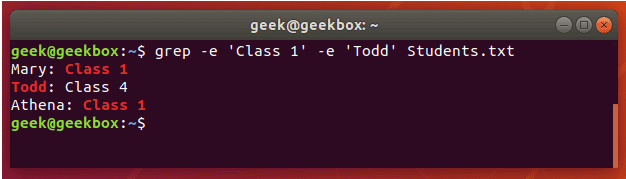
注意,我们只需要在包含空格的字符串周围使用引号。
grep egrep fgrep pgrep zgrep之间的区别
不同的grep开关都包含在不同的二进制文件中。在现代Linux系统上,您可以在基本的grep命令中找到这些开关,但是常见的是发行版也支持其他命令。
$ egrep is the equivalent of grep -E
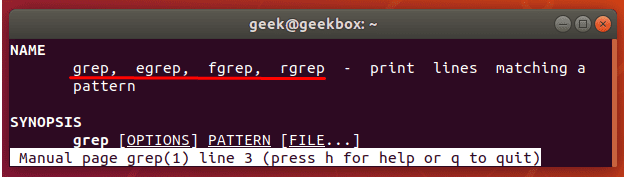
此开关会将模式解释为扩展的正则表达式。您可以执行许多不同的操作,但是这里有一个示例,说明将正则表达式与grep一起使用的样子。
让我们在文本文档中搜索包含两个连续的“ p”字母的字符串:
  $ egrep p\{2} fruits.txt
	# 或者
  $ grep -E p\{2} fruits.txt
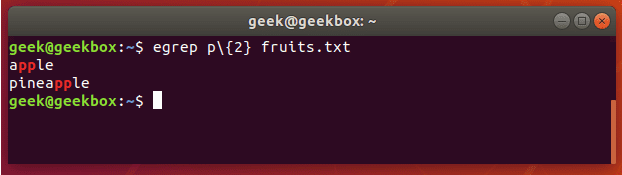
$ fgrep is the equivalent of grep -F
此开关会将模式解释为固定字符串的列表,并尝试匹配其中的任何一个。当您需要搜索正则表达式字符时,此功能非常有用。这意味着您不必像常规grep那样转义特殊字符。
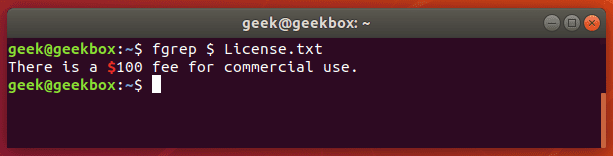
pgrep是用于搜索系统上正在运行的进程的名称并返回其相应进程ID的命令。例如,您可以使用它来查找SSH守护进程的进程ID:
$ pgrep sshd

这在功能上类似于仅将“ ps”命令的输出传递给grep。

您可以使用此信息来终止正在运行的进程或对系统上运行的服务进行故障排除。
zgrep用于搜索压缩文件中的模式。它使您可以搜索压缩存档中的文件,而不必先解压该存档,基本上可以节省一两个步骤。
$ zgrep apple fruits.txt.gz
zgrep也可用于tar文件,但似乎只能告诉您它是否能够找到匹配项。
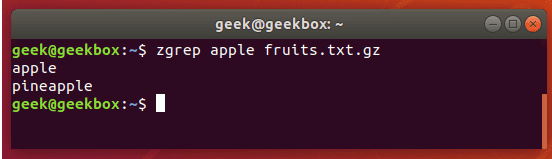
我们之所以提及这一点,是因为用gzip压缩的文件通常是tar存档。
find和grep之间的区别
对于刚从Linux命令行开始的用户,重要的是要记住find和grep是两个具有两个截然不同功能的命令,尽管它们都用于“查找”用户指定的内容。
如本教程第一个示例所示,使用grep搜索ls命令的输出时,使用grep可以很方便。
但是,如果您需要递归搜索文件名(如果使用通配符(星号),则需要搜索文件名的一部分),那么使用'find'命令会更方便。
$ find /path/to/search -name name-of-file
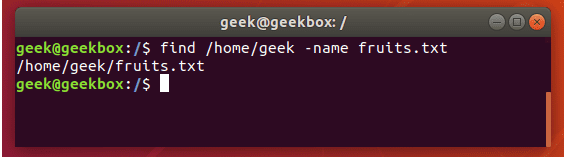
上面的输出显示find命令能够成功找到我们搜索的文件。
递归搜索
可以将-r开关与grep一起使用,以递归方式搜索目录及其子目录中的所有文件,以查找指定的模式。
$ grep -r pattern /directory/to/search
如果您未指定目录,则grep只会搜索您当前的工作目录。在下面的屏幕截图中,grep找到了两个与我们的模式匹配的文件,并返回了它们的文件名和它们所在的目录。

填充空间或制表符
正如我们在前面关于如何搜索字符串的解释中提到的那样,如果文本包含空格,则可以将文本包装在引号中。选项卡也可以使用相同的方法,但是稍后我们将说明如何在grep命令中添加选项卡。
在引号内放置一个空格或多个空格,以使grep搜索该。
$ grep " " sample.txt
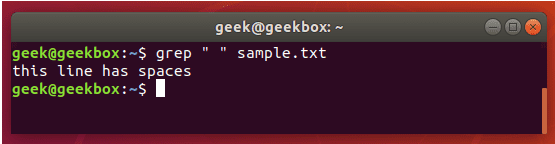
您可以使用grep搜索标签的方法有几种,但是大多数方法都是实验性的,或者在不同的发行版中可能不一致。
最简单的方法是仅搜索制表符本身,您可以通过在键盘上按ctrl + v,然后按Tab来产生该字符。
通常,在终端窗口中按Tab会告诉终端您要自动完成命令,但是事先按ctrl + v组合键将导致按常规方式在文本编辑器中写出Tab字符。
$ grep " " sample.txt
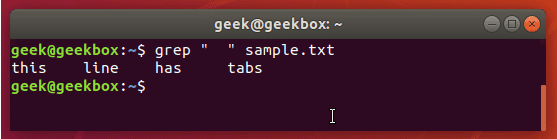
熟悉Linux中的配置文件时,知道此小技巧会特别有用,因为选项卡通常用于将命令与其值分开。
使用正则表达式
通过使用正则表达式进一步扩展了Grep的功能,从而使您的搜索更加灵活。存在几种,在下面的示例中,我们将介绍一些最普通的:
[]括号用于匹配一组字符中的任何一个。
$ grep "Class [123]" Students.txt
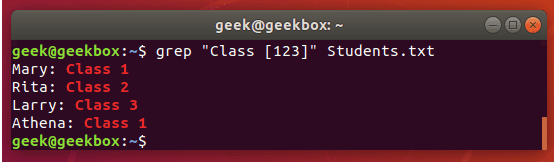
此命令将返回任何显示“ Class 1”,“ Class2”或“ Class 3”的任何行。
带连字符的[-]括号可用于指定数字或字母字符范围。
$ grep "Class [1-3]" Students.txt
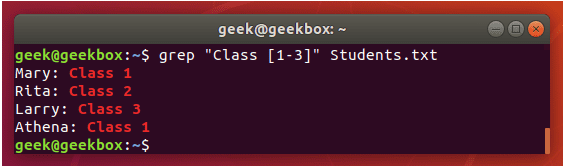
我们得到与以前相同的输出,但是该命令的键入要容易得多,尤其是当我们使用更大范围的数字或字母时。
^脱字符号用于搜索只出现在行的开头的模式。
grep“ ^ Class” Students.txt
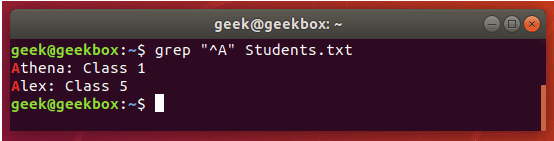
带方括号的脱字符号用于从搜索模式中排除字符。
$ grep "Class [^1-2]" Students.txt
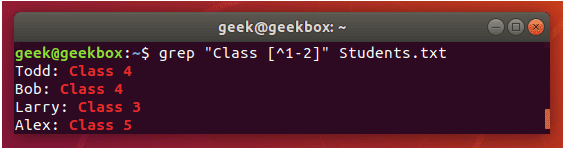
$ dollar符号用于搜索只出现在行的末尾的模式。
$ grep "1$" Students.txt
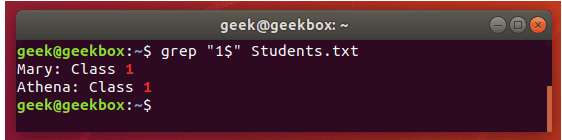
.点用于匹配任何一个字符,因此它是通配符,但仅适用于单个字符。
$ grep "A….a" Students.txt
Grep gz文件,无需解压
如前所述,zgrep命令可用于搜索压缩文件,而无需先将其解压。
$ zgrep word-to-search /path/to/file.gz
您还可以使用zcat命令显示gz文件的内容,然后将输出到grep,以隔离包含搜索字符串的行。
$ zcat file.gz | grep word-to-search
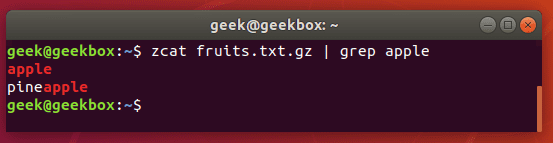
压缩文件中的Grep电子邮件地址
我们可以使用一个奇特的正则表达式从zip文件中提取所有电子邮件地址。
$ grep -o '[[:alnum:]+\.\_\-]*@[[:alnum:]+\.\_\-]*' emails.txt
-o标志仅提取电子邮件地址,而不显示包含电子邮件地址的整行。这样可以产生更清晰的输出。
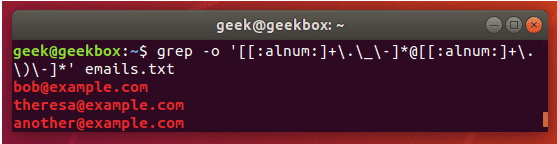
与Linux中的大多数事情一样,有多种方法可以做到这一点。您还可以使用egrep和一组不同的表达式。但是上面的示例工作得很好,并且是提取电子邮件地址并忽略其他所有内容的非常简单的方法。
Grep IP地址
IP地址的查询可能会变得有些复杂,因为我们不仅能让grep查找由点号分隔的4个数字,可以,但是该命令也有可能返回无效的IP地址。
以下命令将仅查找和隔离有效的IPv4地址:
$ grep -E -o "(25[0-5]|2[0-4][0-9]|[01]?[0-9][0-9]?)\.(25[0-5]|2[0-4][0-9]|
我们在Ubuntu服务器上使用它只是为了查看最新的SSH尝试来自何处。
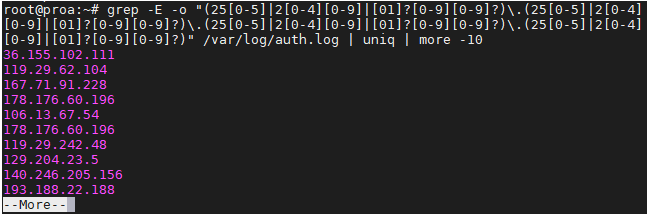
为避免重复信息和使屏幕泛滥,您可能希望像上面的屏幕截图一样,将grep命令传递给“ uniq”和“ more”。
Grep or 条件
您可以通过几种不同的方式对grep使用or条件,但是我们将向您展示一种需要最少击键且最容易记住的方法:
$ grep -E 'string1|string2' filename
或者,从技术上讲,使用egrep的击键次数甚至更少:
$ egrep 'string1|string2' filename
grep或条件忽略大小写默认情况下,grep区分大小写,这意味着您必须精确搜索大写的字符串。您可以通过告诉grep忽略-i开关的情况来避免这种情况。
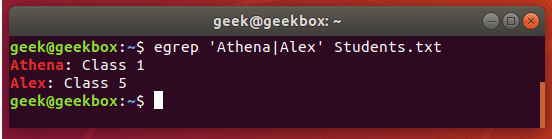
忽略大小写
默认情况下,grep区分大小写,这意味着您必须精确搜索大写的字符串。通过使用-i开关告诉grep忽略大小写,可以避免这种情况。
$ grep -i string filename
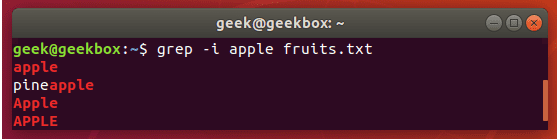
搜索时区分大小写
如果我们要搜索一个字符串,其中第一个可以是大写或小写,但字符串的其余部分应该是小写怎么办?在这种情况下,无法使用-i switch 忽略大小写,所以一种简单的方法是使用方括号。
$ grep [Ss]tring filename
该命令告诉grep除首字母外,其他字母都区分大小写。
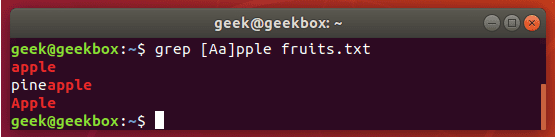
Grep精确匹配
在上面的示例中,每当我们在文档中搜索字符串“ apple”时,grep也会在输出中返回“ pineapple”。为了避免这种情况,并严格搜索“ apple”,可以使用以下命令:
$ grep "\<apple\>" fruits.txt
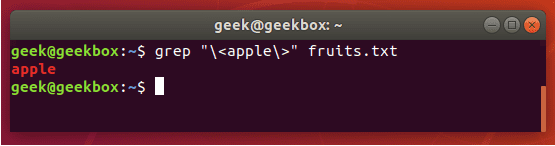
您还可以使用-w开关,它将告诉grep该字符串必须与整行匹配。显然,这只适用于您不希望该行的其余部分完全包含任何文本的情况下有效。
排除模式
要查看文件的内容,但要从输出中排除模式,可以使用-v开关。
$ grep -v string-to-exclude filename
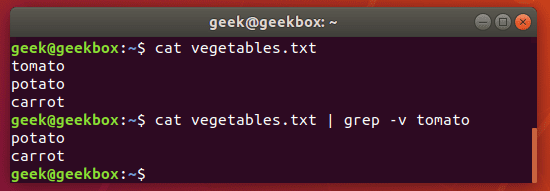
如您在屏幕截图中所见,当我们使用-v开关运行相同的命令时,不再显示排除的字符串
Grep和替换
传递给sed的grep命令可用于替换文件中字符串的所有实例。此命令将在相对于当前工作目录的所有文件中将“ string1”替换为“ string2”:
$ grep -rl 'string1' ./ | xargs sed -i 's/string1/string2/g'
带行号的Grep
要显示搜索字符串所在的行数,请使用-n开关。
$ grep -n string filename
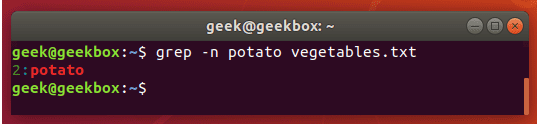
显示之前和之后的行
如果需要更多grep输出上下文,可以使用-c开关在指定的搜索字符串前后显示一行:
$ grep -c 1 string filename
指定您希望显示的行数–在此示例中,我们仅执行了1行。
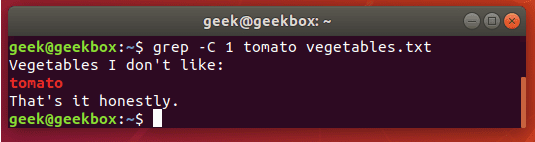
对结果进行排序
将grep的输出传递给sort命令,以按某种顺序对结果进行排序。默认为字母顺序。
$ grep string filename | sort
